
Migration Quickstart Guide
Read our brief quick-start guide, a tutorial on how to get the most out of our plugin. Helping you to migrate your site very easily.
This guide has been created to show you how to get the most out of Transferito.
Once you know how to use our plugin, it's the easiest way to migrate your WordPress website to a new destination.
There are two main parts to the guide. The cPanel Migration Method and the FTP Migration Method.
Our aim; by the end of this guide is to familiarise you with Transferito.
We'll briefly touch on the basic features needed to successfully complete a migration.
If you don't want to read the article, watch the short 2 minute video tutorial below.
I know I said this guide would be brief but bear with me for a minute. In order to explain this properly. We need a tiny bit of context.
Most web hosting companies use a dashboard to enable users to manage their web hosting accounts. The industry leader is called cPanel and it is extremely popular with WordPress web hosts.
We've developed a seamless integration with cPanel, helping you to migrate your WordPress website quicker and easier than ever.
From your website URL https://my-luxury-fashion.com to the new URL https://famous-fashion.com
To check whether you can take advantage of our superfast migrations. Enter your Destination Server URL in the input field below and click on the "Check My Website" button
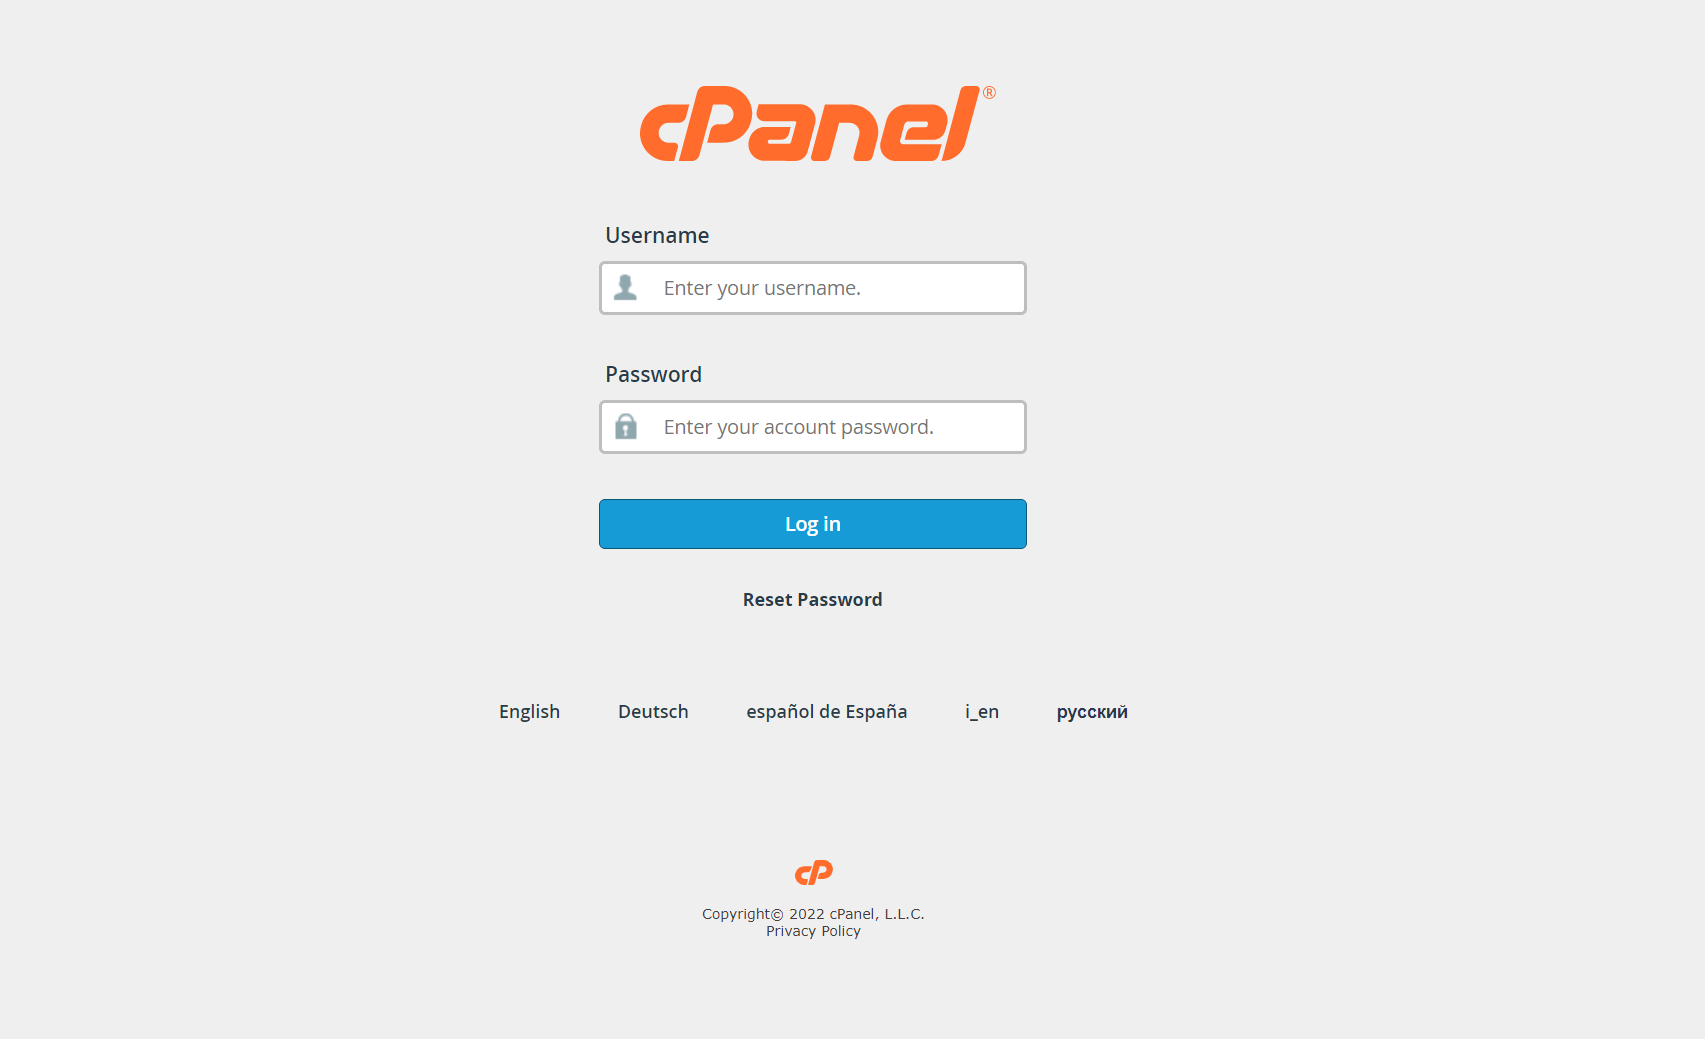
The is the cPanel default login page
Before you can start your migration you need to have your cPanel login details. The next section will show you how to find those details.
This is the Transferito cPanel Login page in the plugin
When you sign up for your web hosting account your host may have provided you with important login information in your welcome email such as:
If they haven't provided you with your cPanel login details in your welcome email. You will need to access your cPanel dashboard in order to get your details.
Step 1. Login to your hosting account
Step 2. Click on the advanced - menu item at the bottom left hand side of the page.
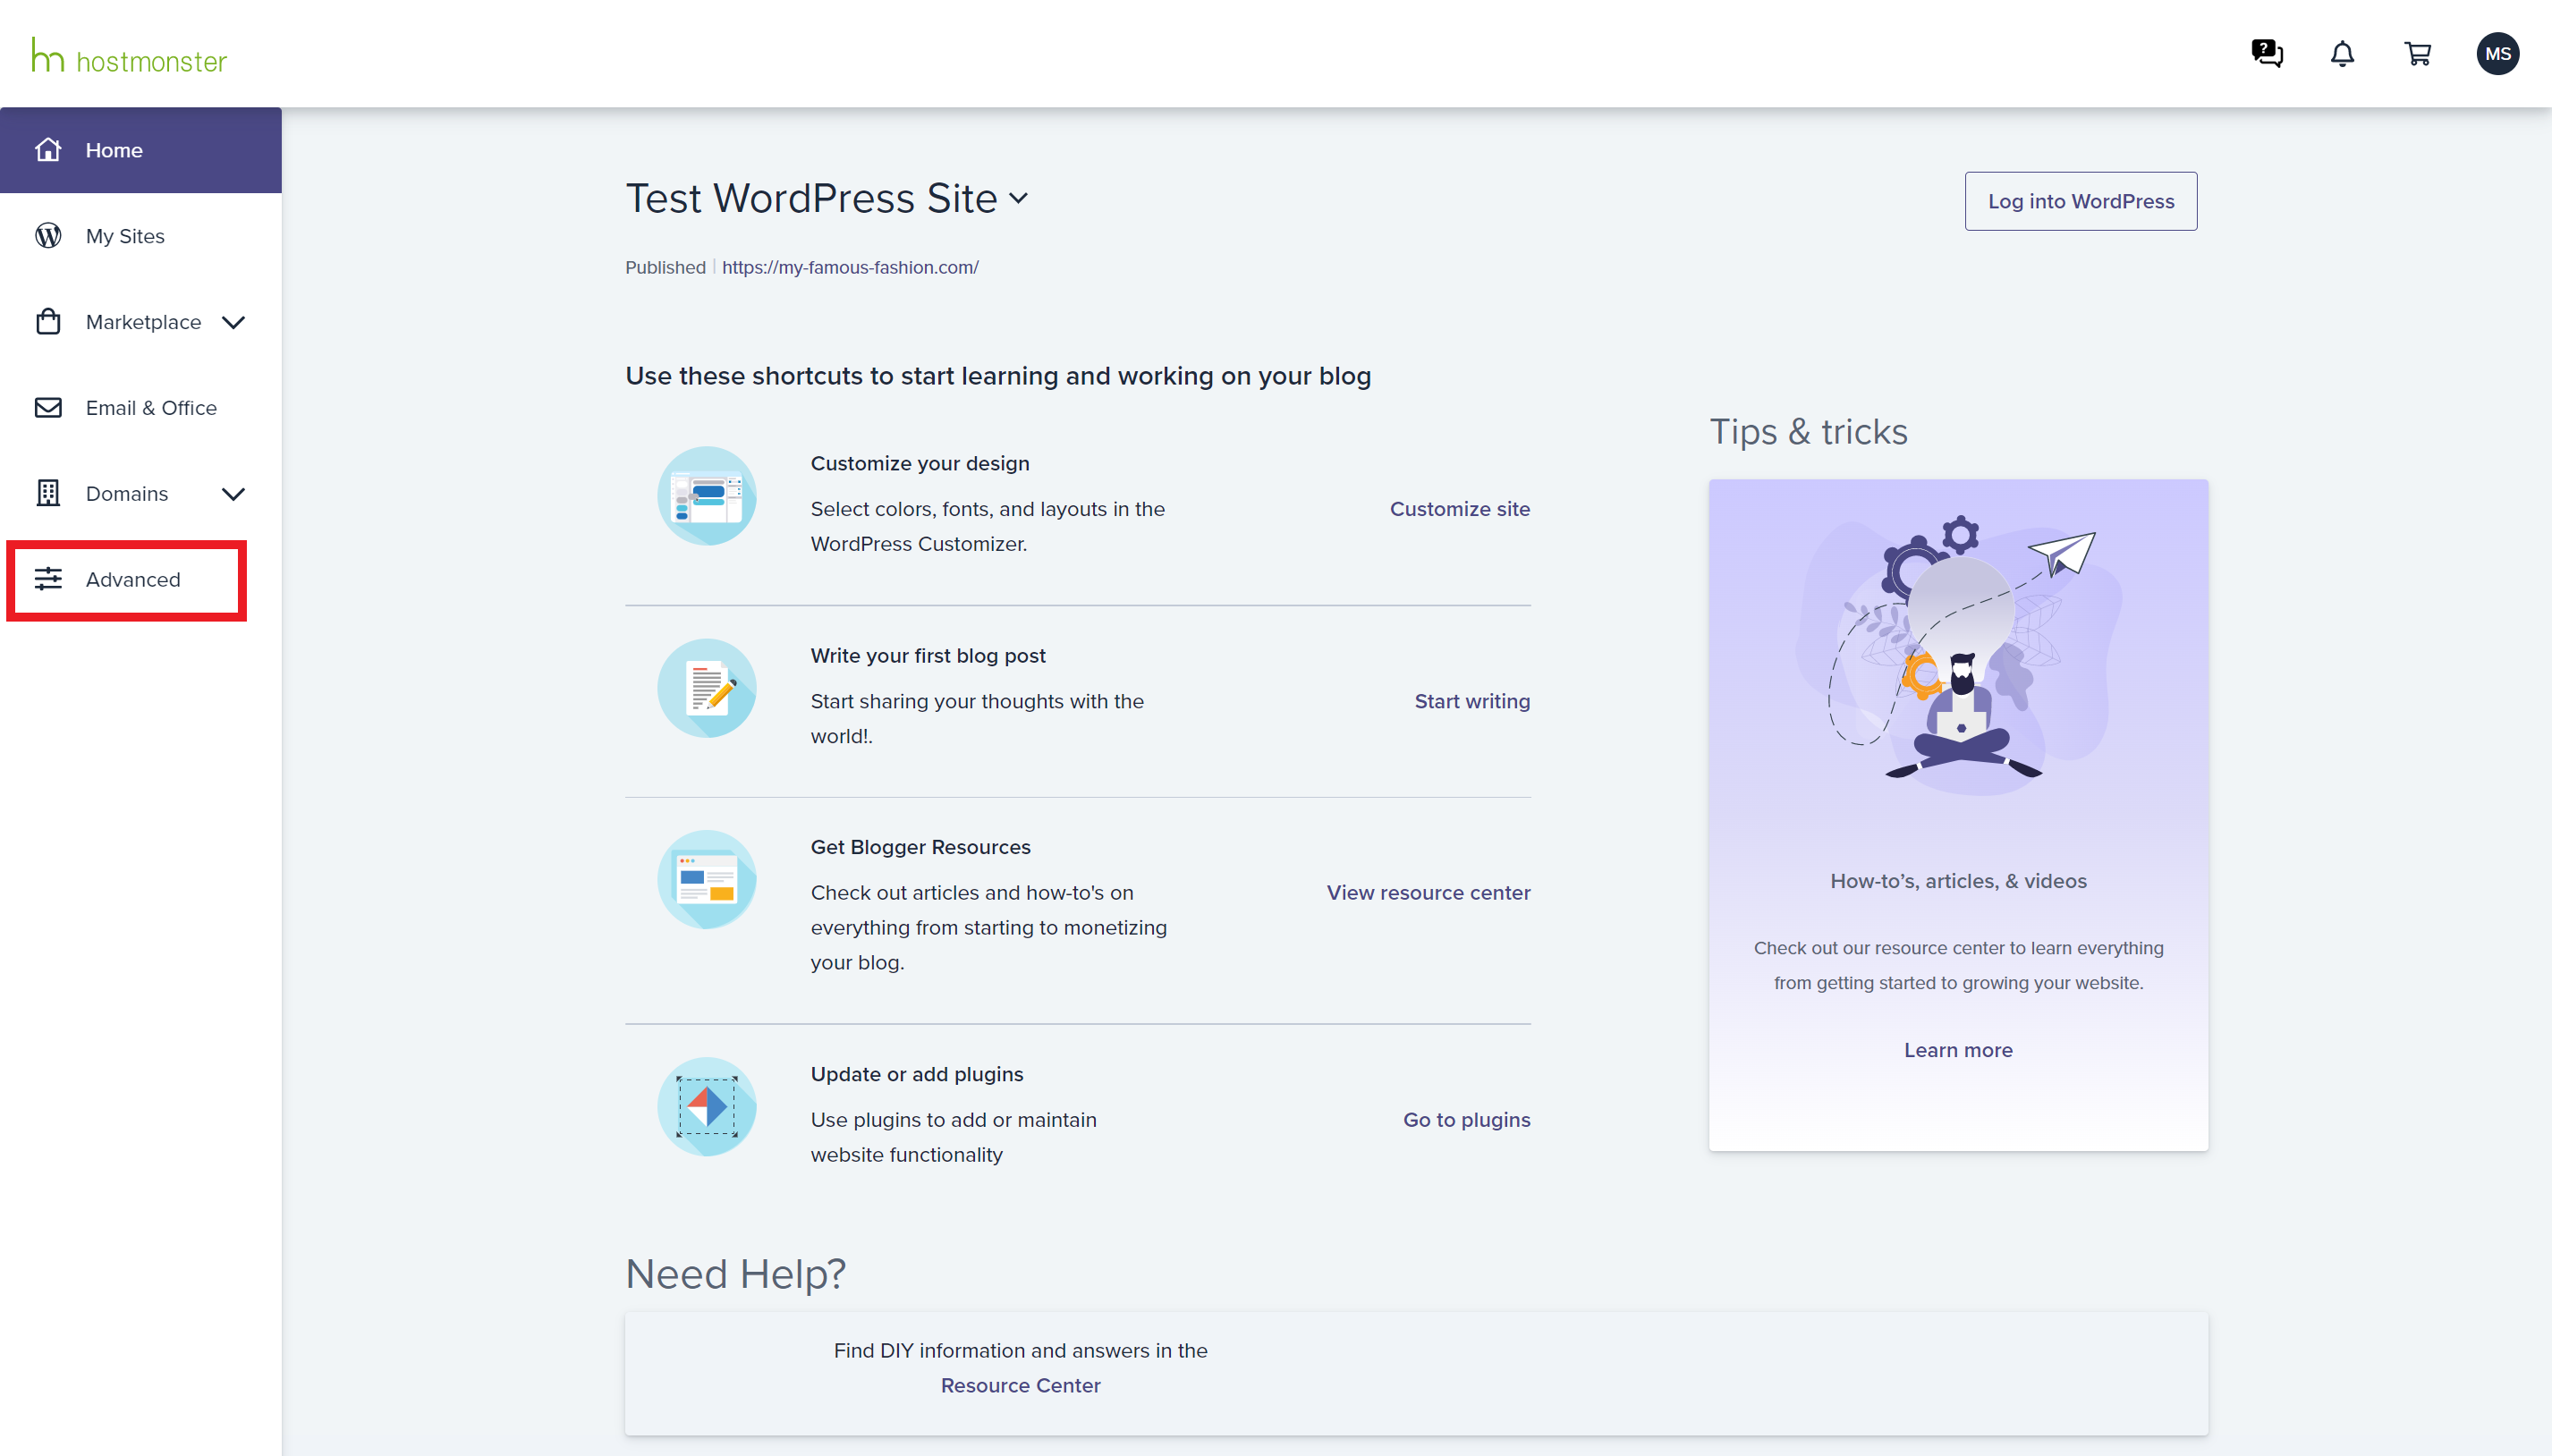
Clicking on the advanced menu item will take you to the cPanel dashboard
Step 3. You are now in your cPanel dashboard
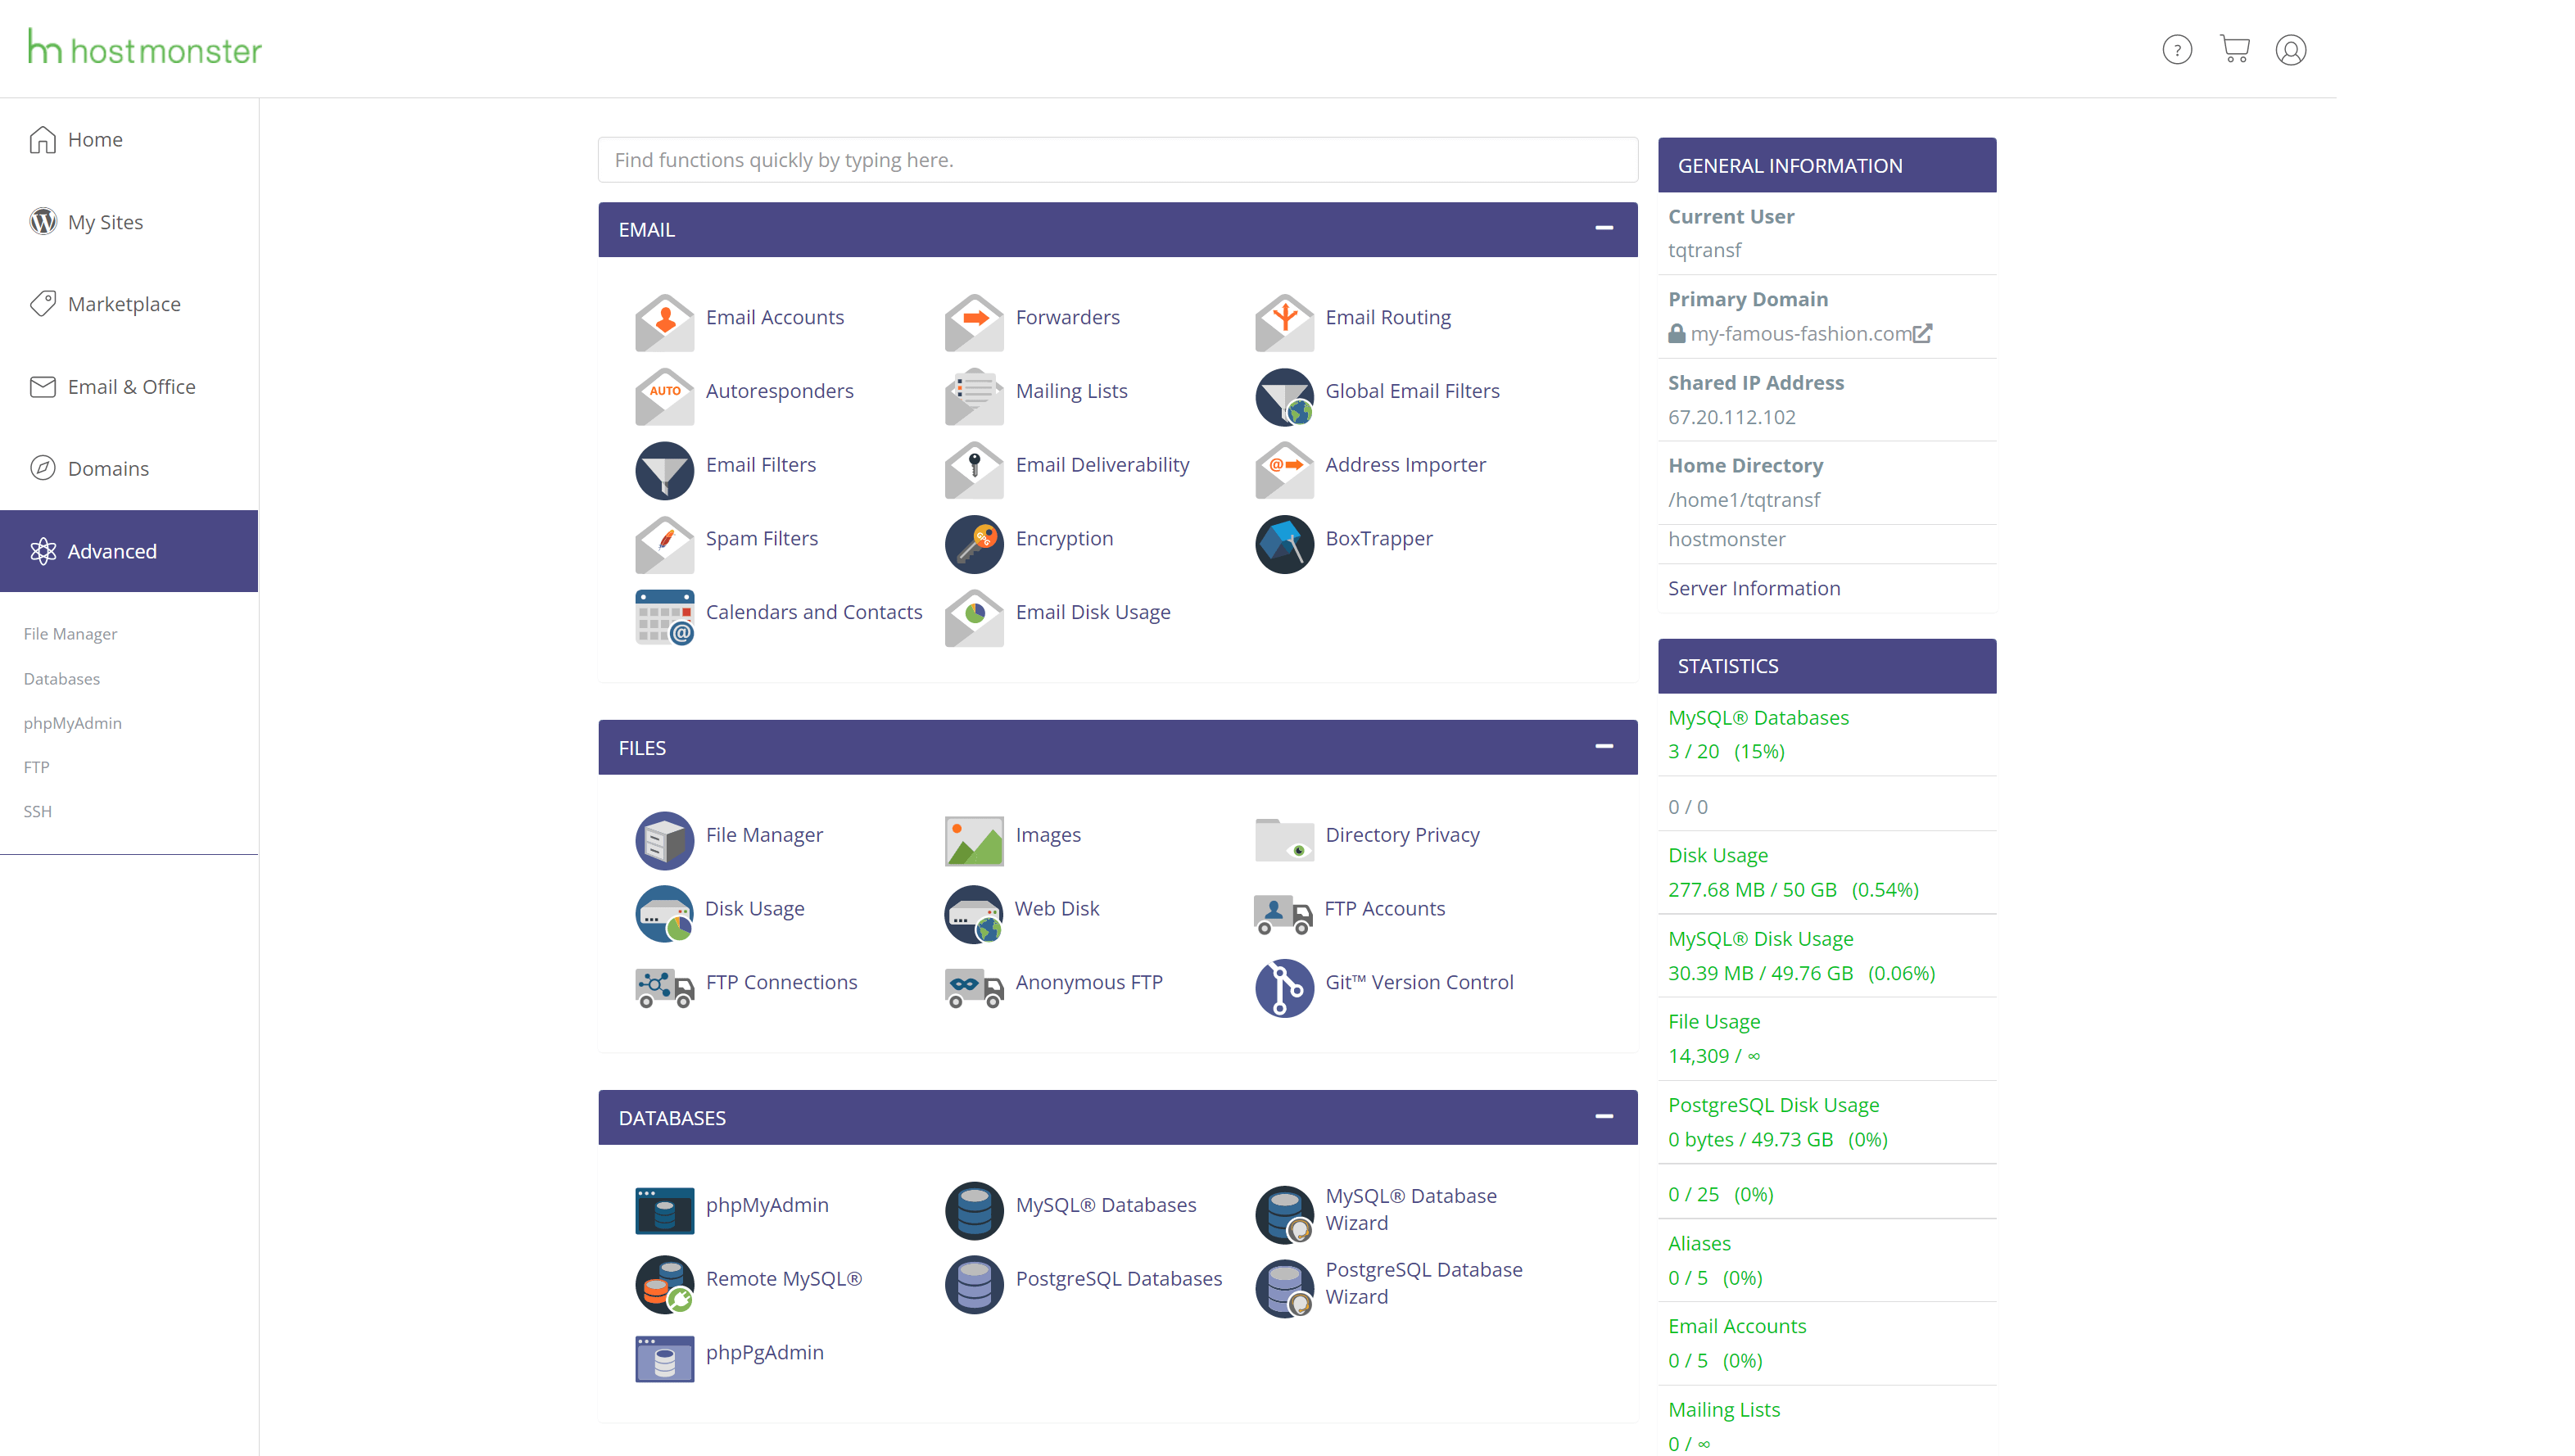
Welcome to the cPanel dashboard. You will be able to manage everything about your hosting account.
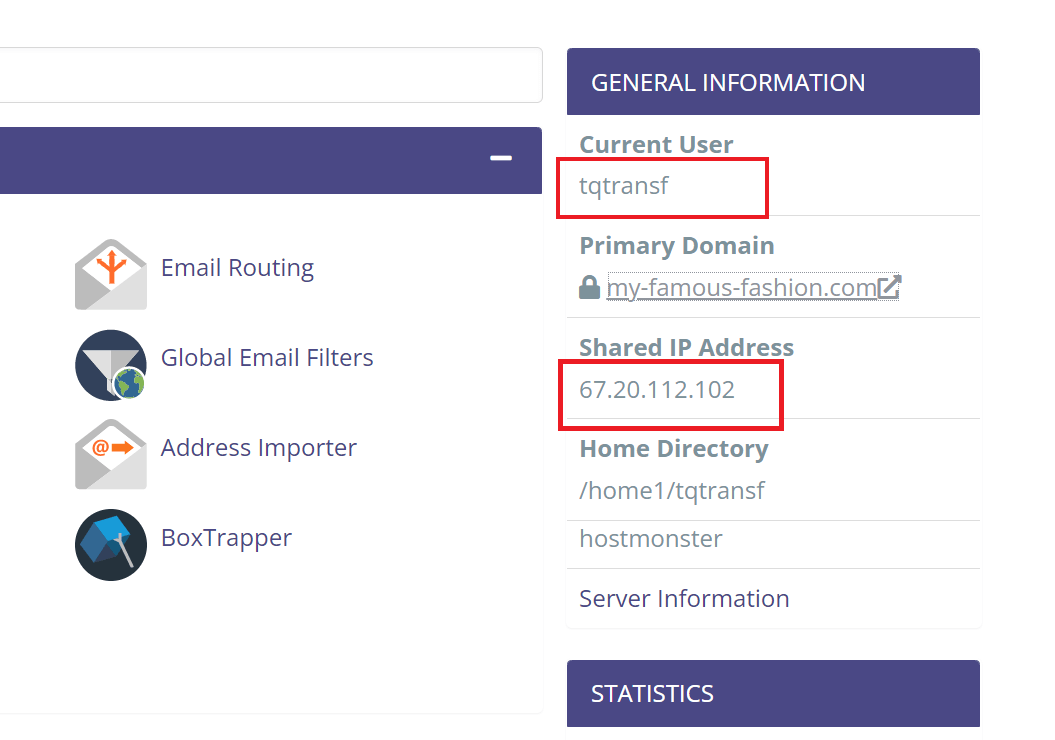
Your cPanel username IS NOT the same as your hosting login username.
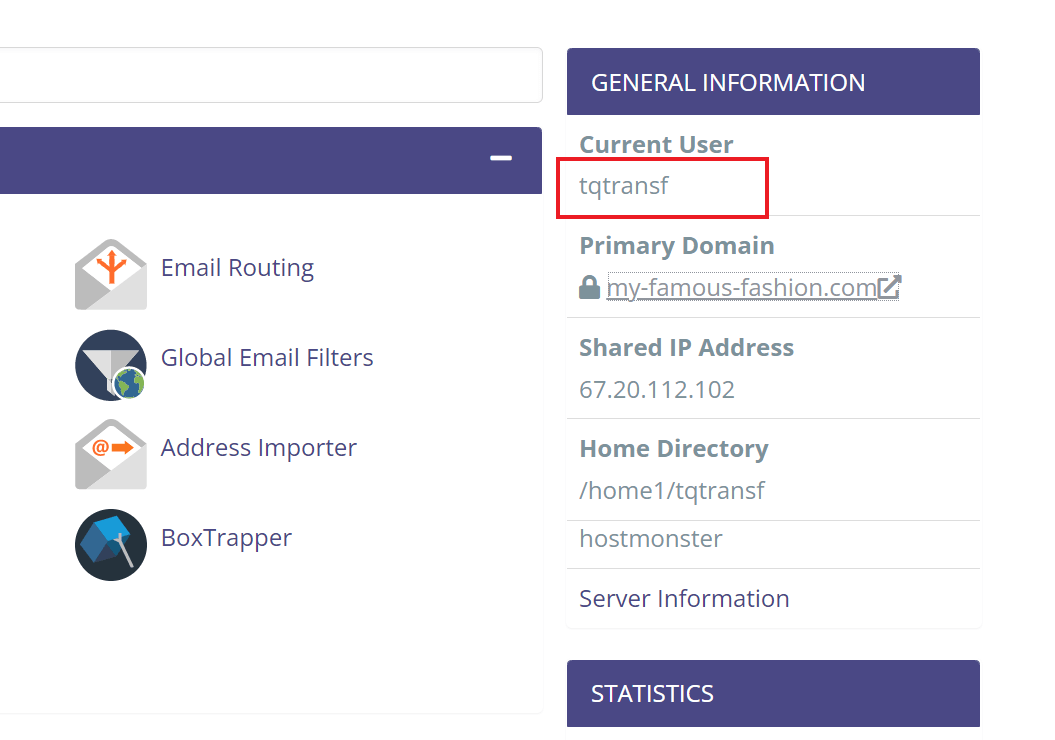
This is where you find your cPanel username
** Make a note of your username. You'll need this later on to process your migration.
An API token is very similar to a password. It is usually a combination of numbers and letters. Some of the benefits of cPanel API tokens are:
To create an API token for Transferito - type "Manage API Tokens"
Click on the Manage API Tokens link to create your API Token
Once you are on the API token page - Name the API token we have named our token "TransferitoToken"
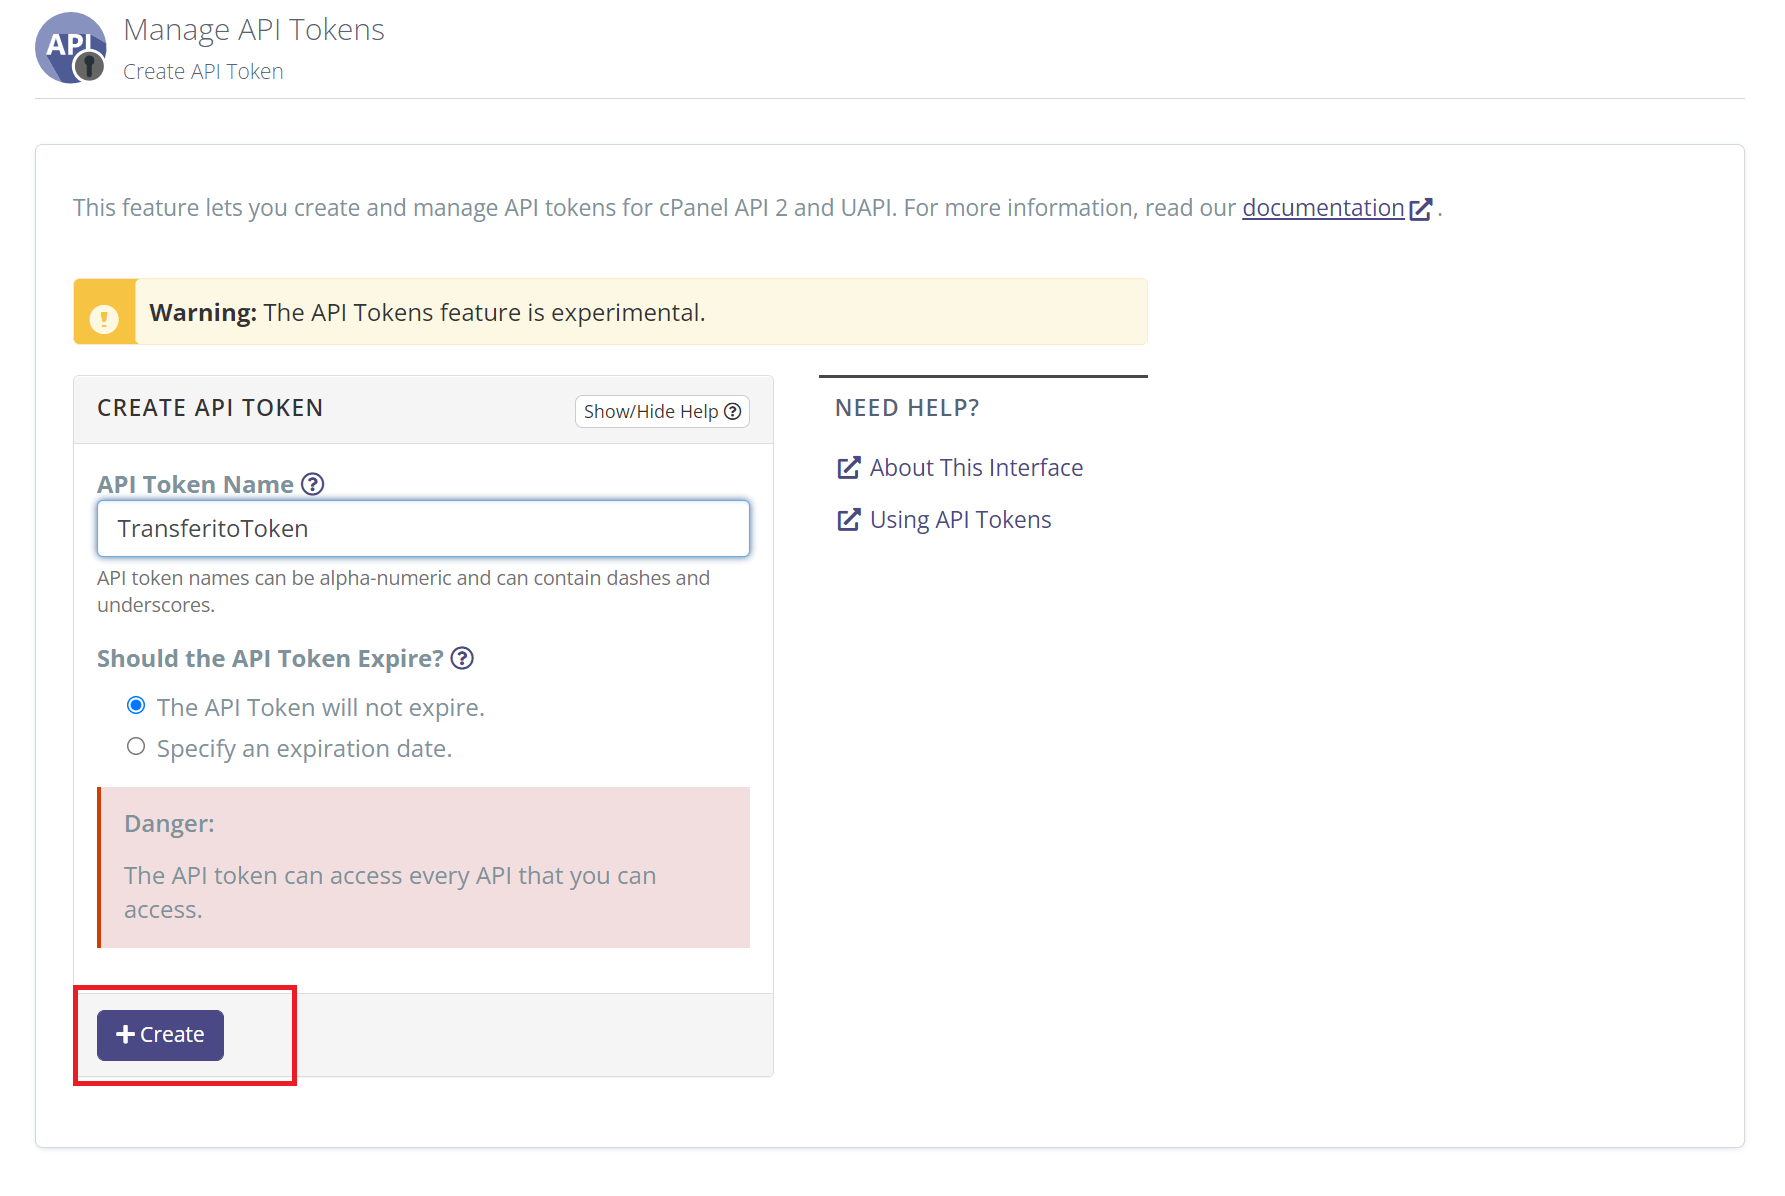
Click on the create button to create your API token
** Again, make a note of your API token. You'll need this later on to process your migration.
From your website URL https://my-luxury-fashion.com to the new URL https://famous-fashion.com
Enter your Destination Server URL - into the input field
Click on the NEXT STEP button to proceed to the Transferito cPanel login page
Transferito redirects you to this page after you've entered your "Destination Server URL"
Transferito cPanel Login Page
If you are using your hosting password. Enter your username and password
Click the "NEXT STEP" button
If your details are correct, you will proceed to the select URL page
Once you've submitted your correct cPanel details. You'll be presented with a page that will ask you which url you want to migrate to. Select the correct one.
Click on the START MIGRATION button
Congratulations!!
You've used the correct details and you're all good to go.
In progress migration
Just sit back and relax and wait for your migration to complete.
From your website URL https://famous-fashion.com to the new URL https://famous-fashion.com
There are occasions when you may need to move your website from one web host to another but your website URL is not going to change.
When this happens:
You will need to create a temporary URL. So that we can access your site.
Let's go back to the cPanel dashboard
Make a note of your username and your IP address
To create your temporary URL we'll put these two together
e.g. (ip-address)/~(username)
Enter your temporary URL, your web host may also provide you with one of these
If your web host does not use cPanel you can still use Transferito to migrate your WordPress website.
From your website URL https://my-luxury-fashion.com to the new URL https://famous-fashion.com
Once you have entered your Destination Server URL into the input field.
Click on the NEXT STEP button
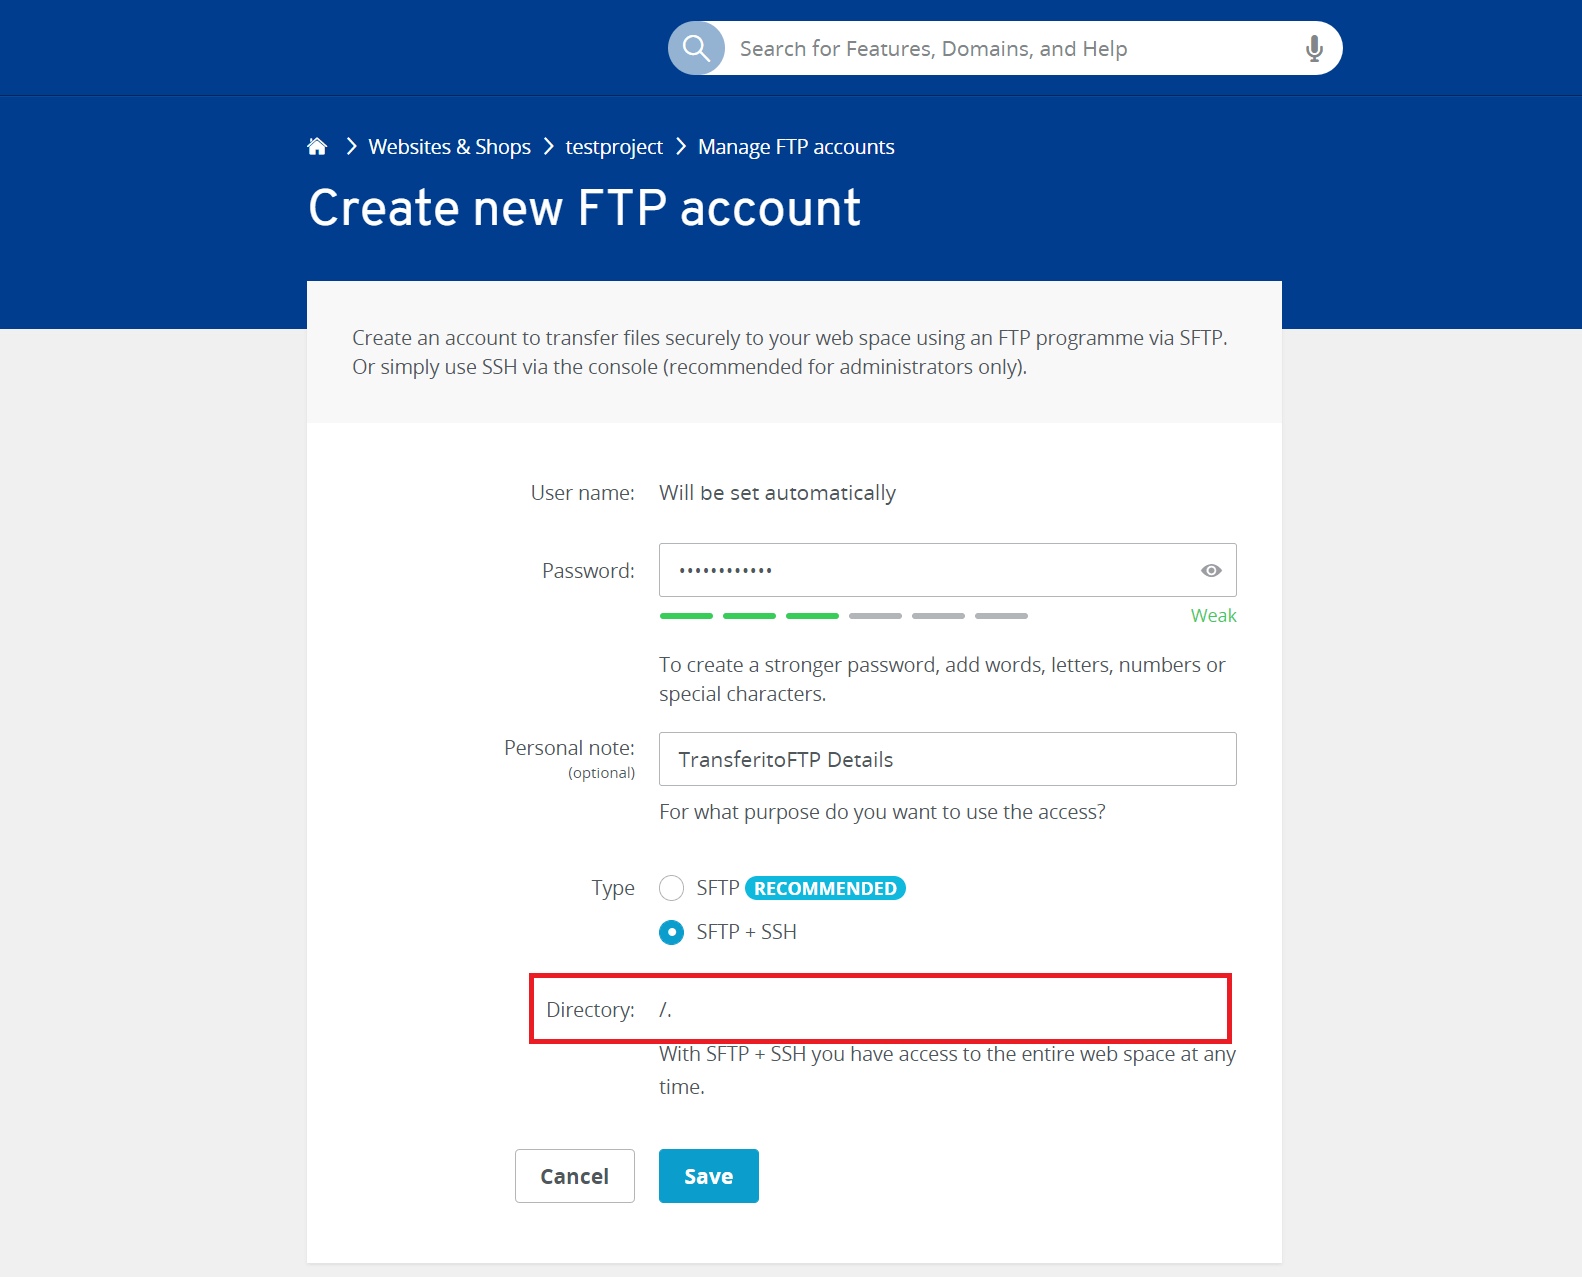
You will be redirected to a page that will ask you to fill out your Destination Server FTP details.
Fill out your SFTP or FTP details and then click on the NEXT STEP button
What are FTP details?
FTP is an acronym for File Transfer Protocol. In its simplest form. FTP is a mechanism used to transfer files from one server to another server.
If we use the analogy of moving house, we can further simplify FTP into 5 simple points:
Hosting providers who do not have cPanel. Will provide an alternative dashboard, allowing you to manage your FTP accounts.
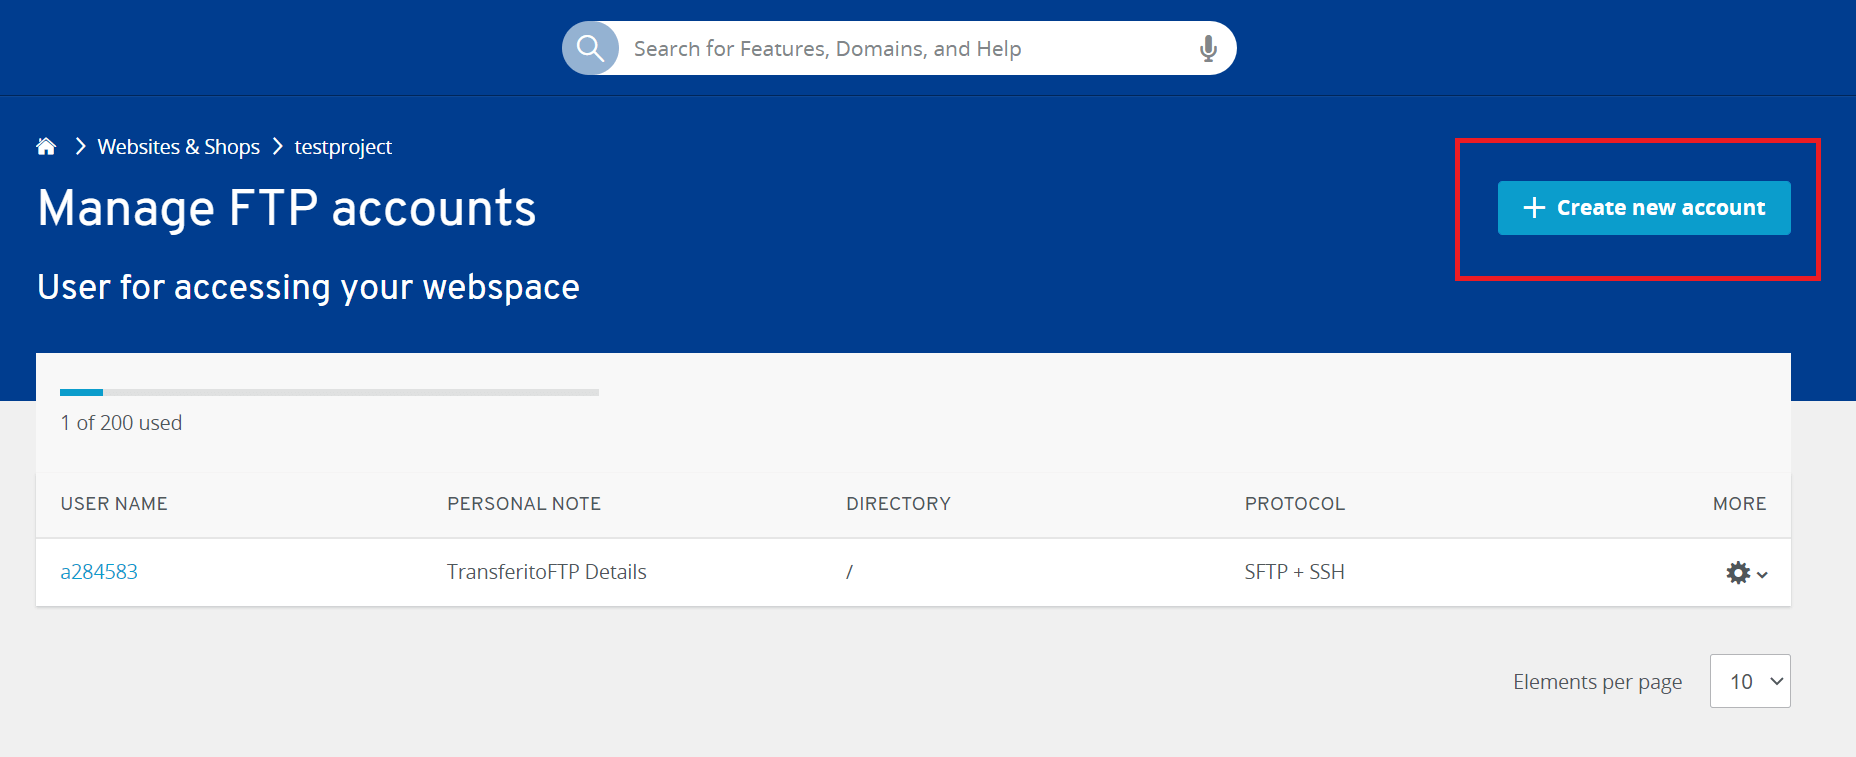
Click on the Create new account button to create a new FTP account
Your FTP details consist of the following:
When you have your FTP details please make a note of them.
Click on the Create new account button to create a new FTP account
Your FTP Path is an extremely important piece of information in the migration process. Transferito uses the FTP Path to identify the correct folder to install your site. If you have supplied an incorrect FTP Path during your migration. Transferito will display an error message to let you know that your path is incorrect.
Your FTP Path or your directory is normally associated with your newly created FTP account
The Directory Selector allows Transferito to navigate through your server's directories to find the relevant directory needed to install your WordPress site.
Once you have successfully connected your Destination Server using your FTP details. You will be directed to the screen with the directory selector. The directory selector will search through your server to find the correct WordPress installation directory.
Click on the Select Directory button and then the NEXT STEP button
If this happens click the "Select Directory" button an then the "Next" button. This will select the correct directory needed to install your WordPress site.
The database is a very important part of the Transferito migration process because it stores all the data associated with your WordPress site.
Fill in your Database Details
We have at this point:
All we need now, is to use the correct database details before we process your migration.
This varies depending on your web hosts dashboard. You should be able to look for an icon that looks like a database or a section that mentions databases.
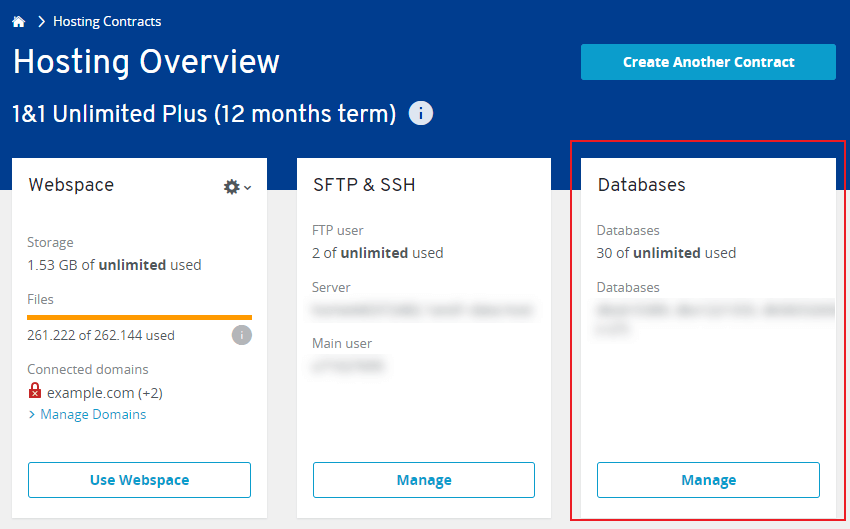
Manage your databases
Once you click on the database icon you will be able to create the following;
A Database,
A Database User
A Database Password
Once your database details have been created, you should have these three pieces of information.
Sometimes you will have additional database information with your database details:
Your input of your Database Details should look like the screenshot below.
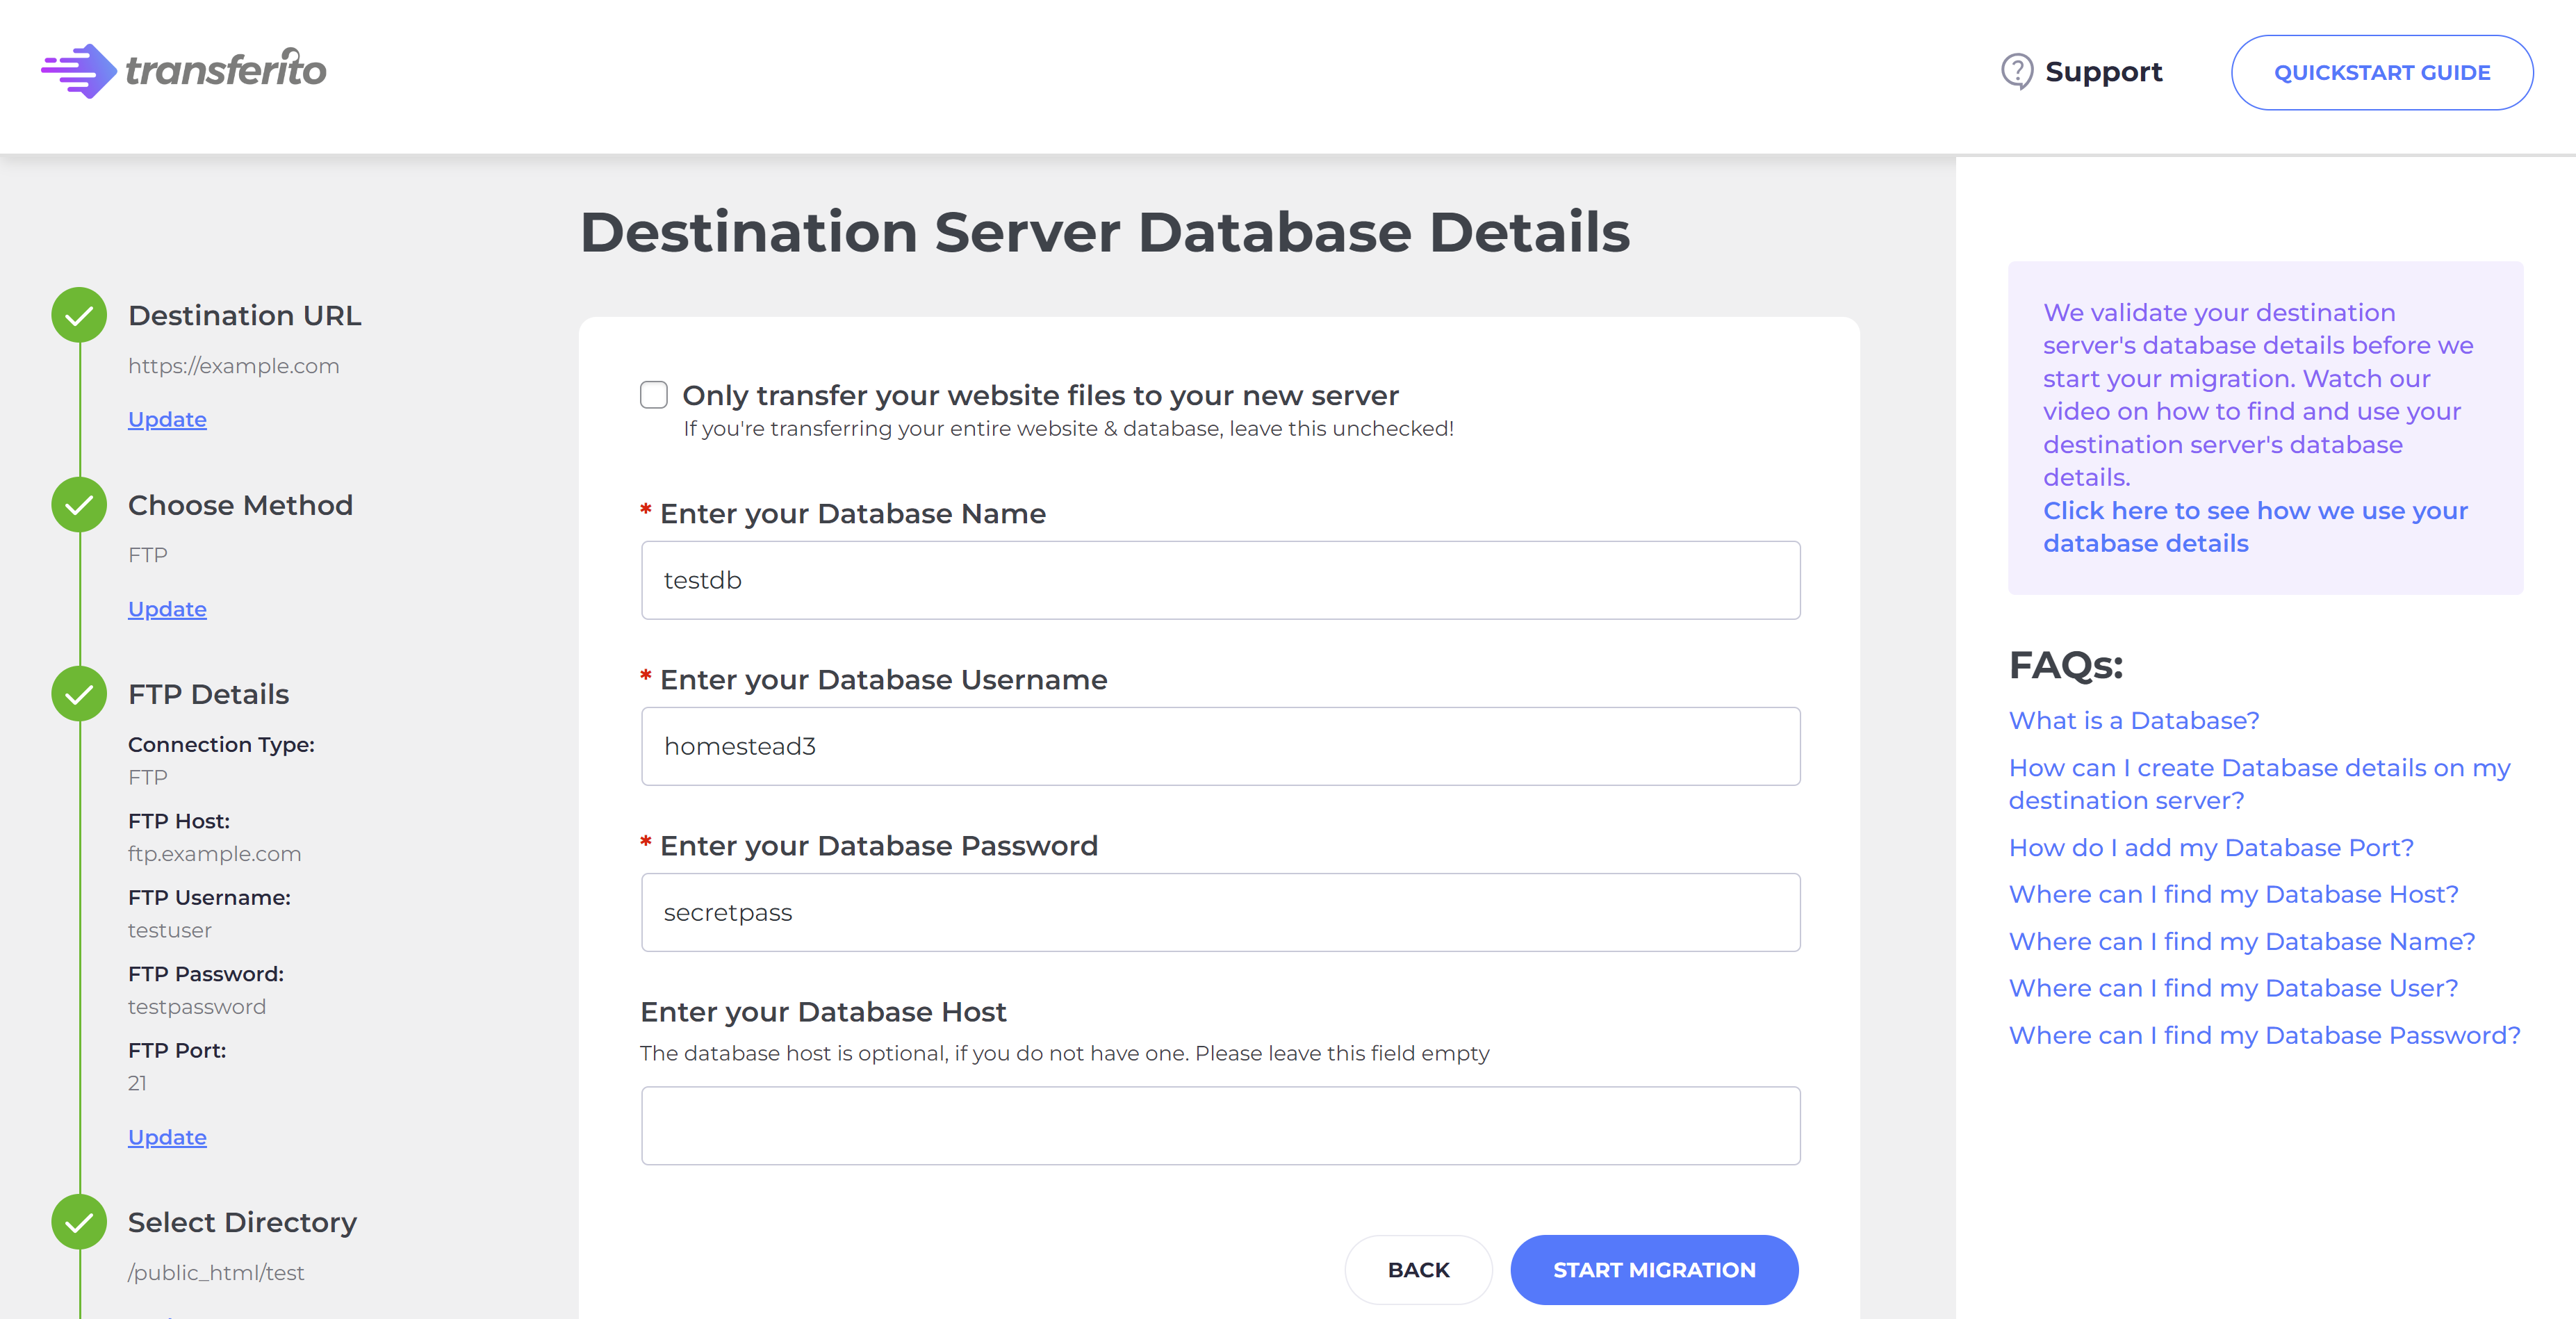
Entering your complete Database details using the default Database Host - localhost
Sometimes your web host will provide you with a different Database Port to connect to. If this is the case, you should add the port at the end of your Database Host.
eg.
The way to connect to this Database using a custom port is to do the follow, please refer to the line below.
(Database Host):(Database Port) becomes
mysql2.connect.mywebhostingcompany.com:3177
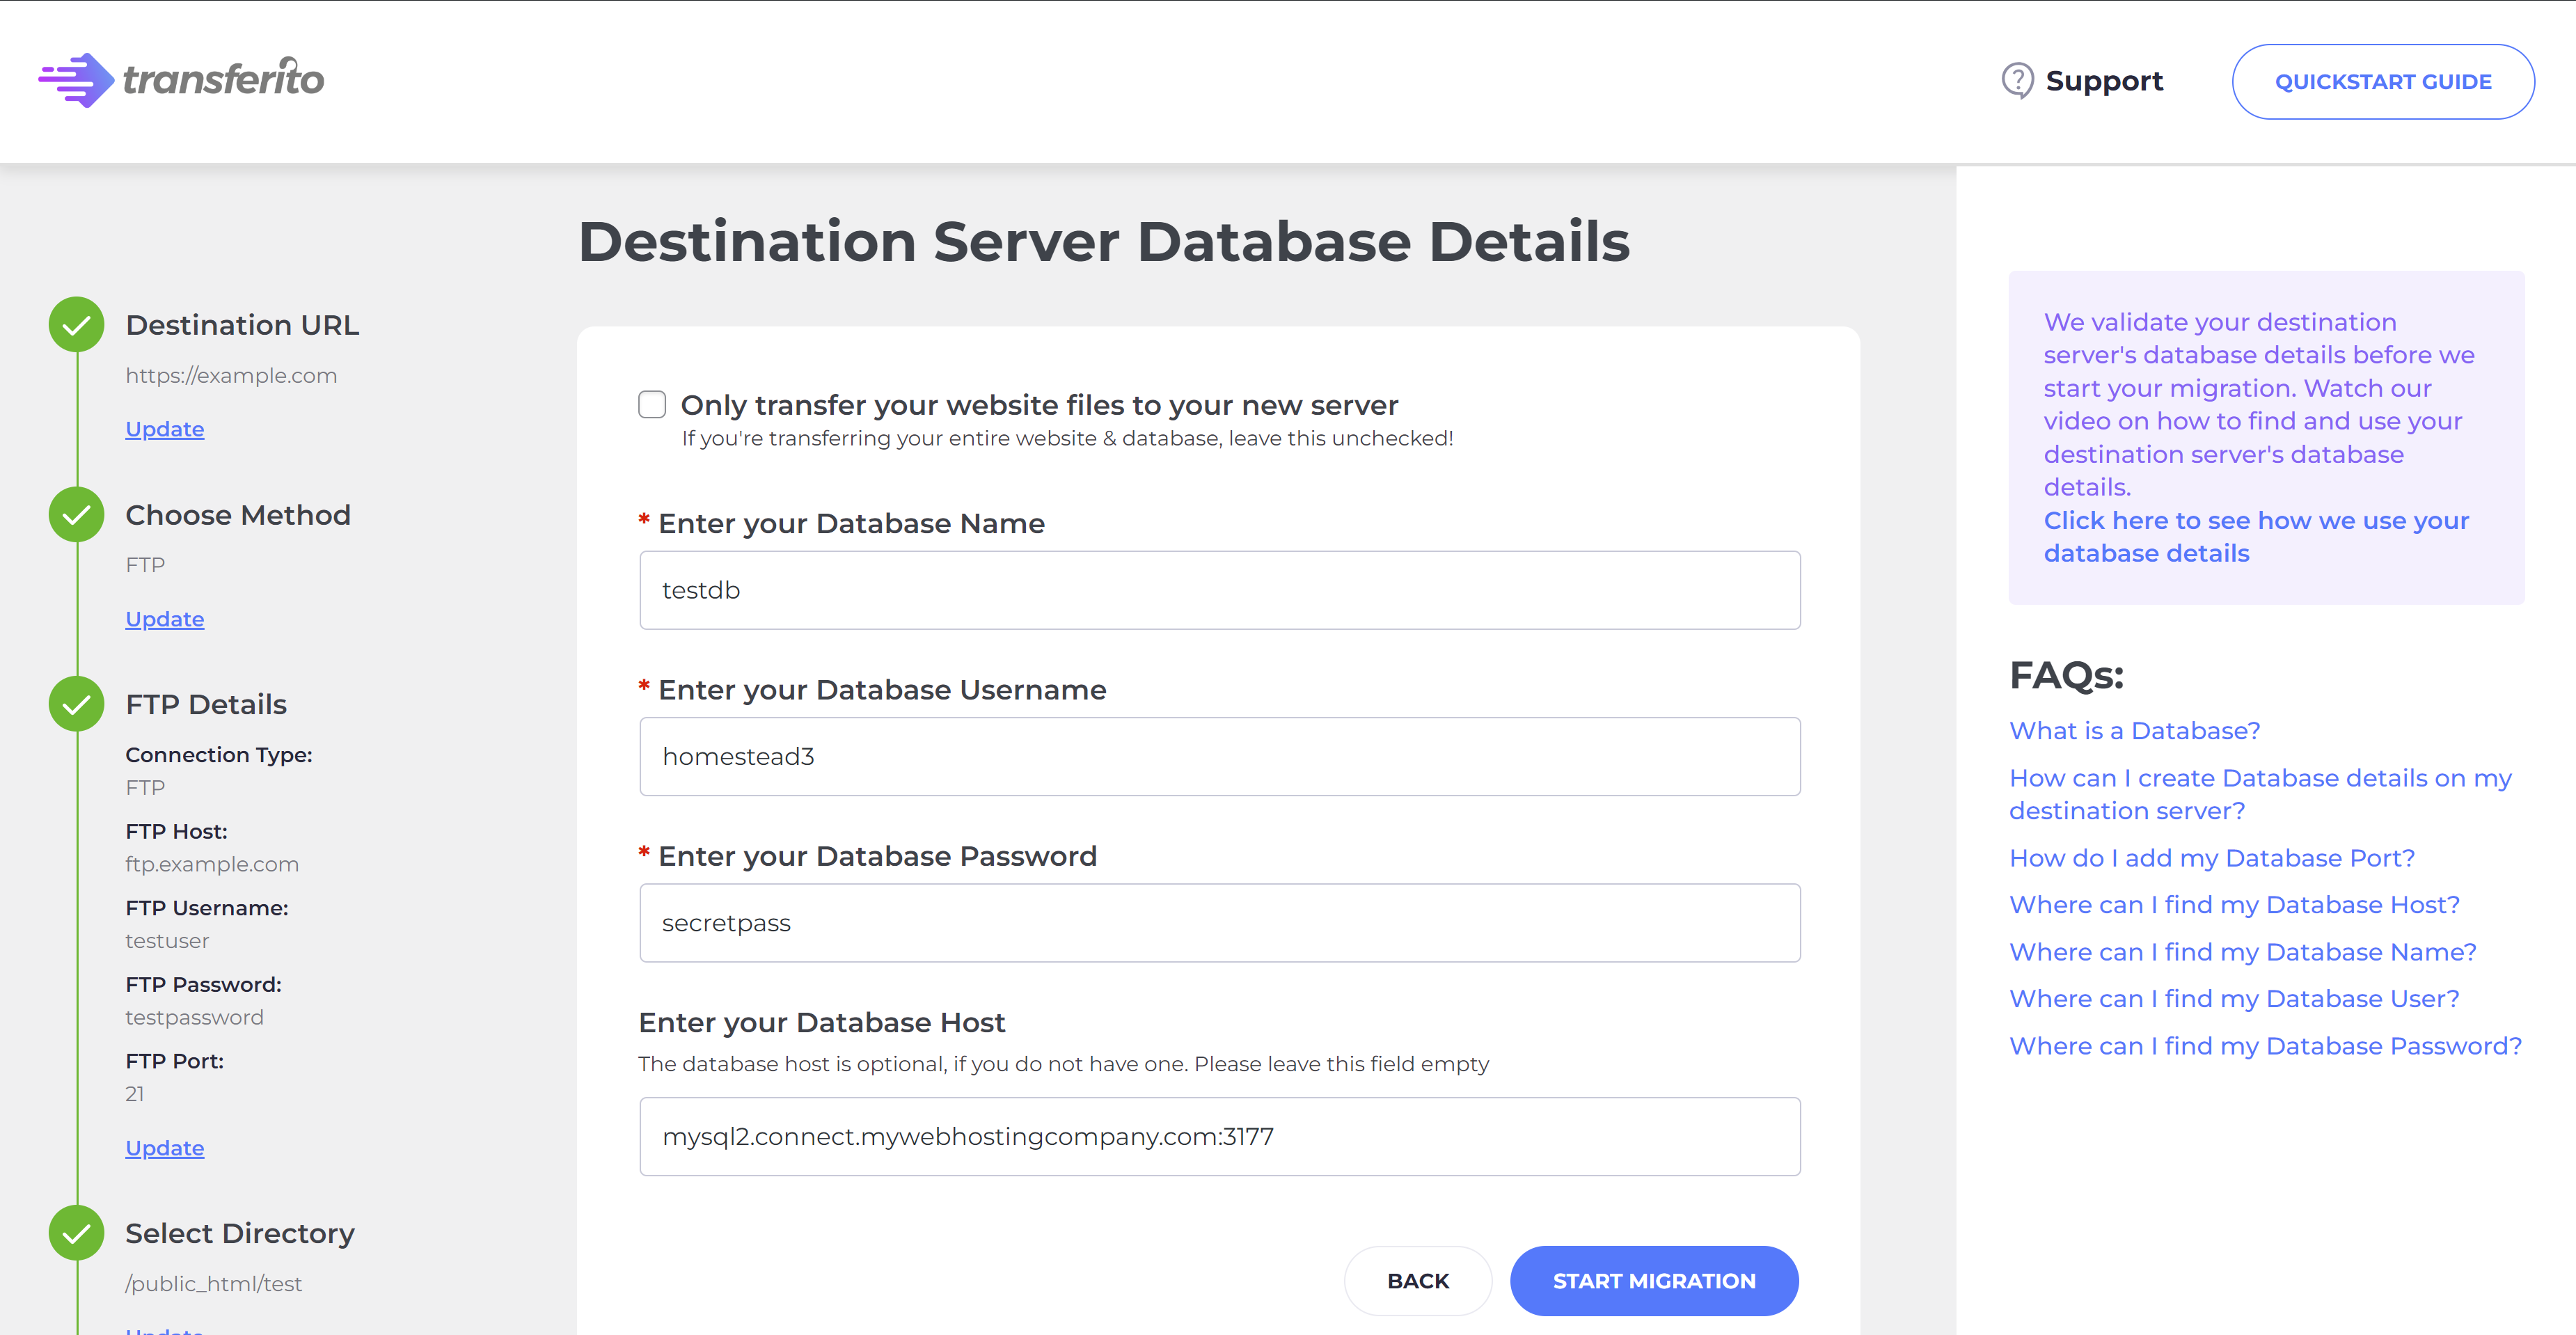
Entering your complete Database details using a different Database Host and different Database Port
Click on the Start Migration button.
Once your migration has started, you'll be presented with the migration progress screen. Just sit back and wait and let Transferito do its magic.