With the FTP migration method, Transferito also needs a database on your destination server to move your site’s content into. Creating the right database details on Bluehost is the key to a successful migration.
This guide shows you how to create a database and database user with the MySQL Database Wizard, and how to add the details to Transferito. If you haven’t set up your FTP account yet, start with Creating your FTP details.
In this guide
Log in to your Bluehost account
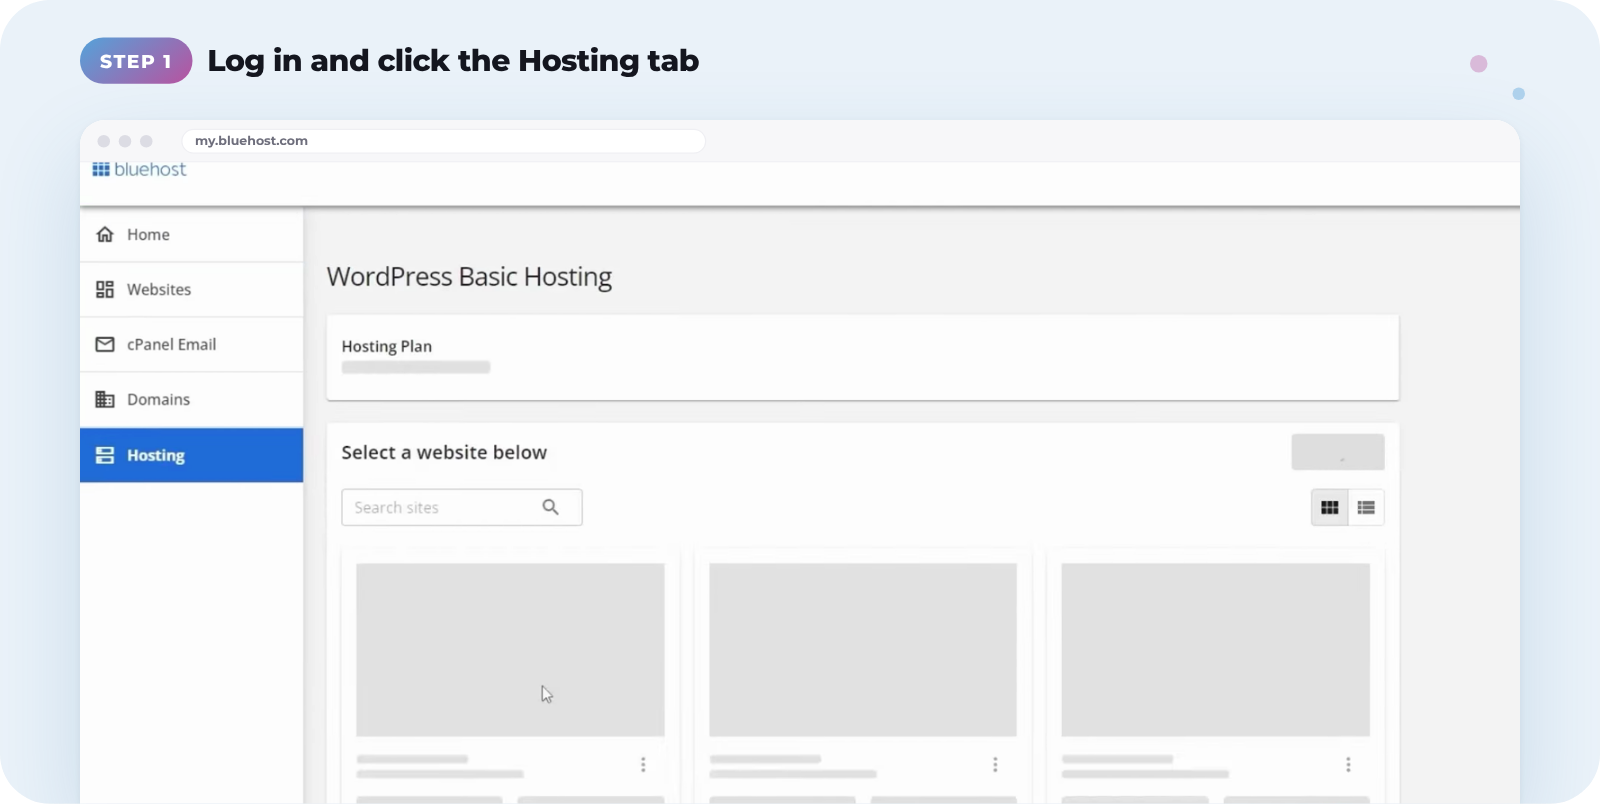
Log in to your Bluehost account, then click the Hosting tab on the left.
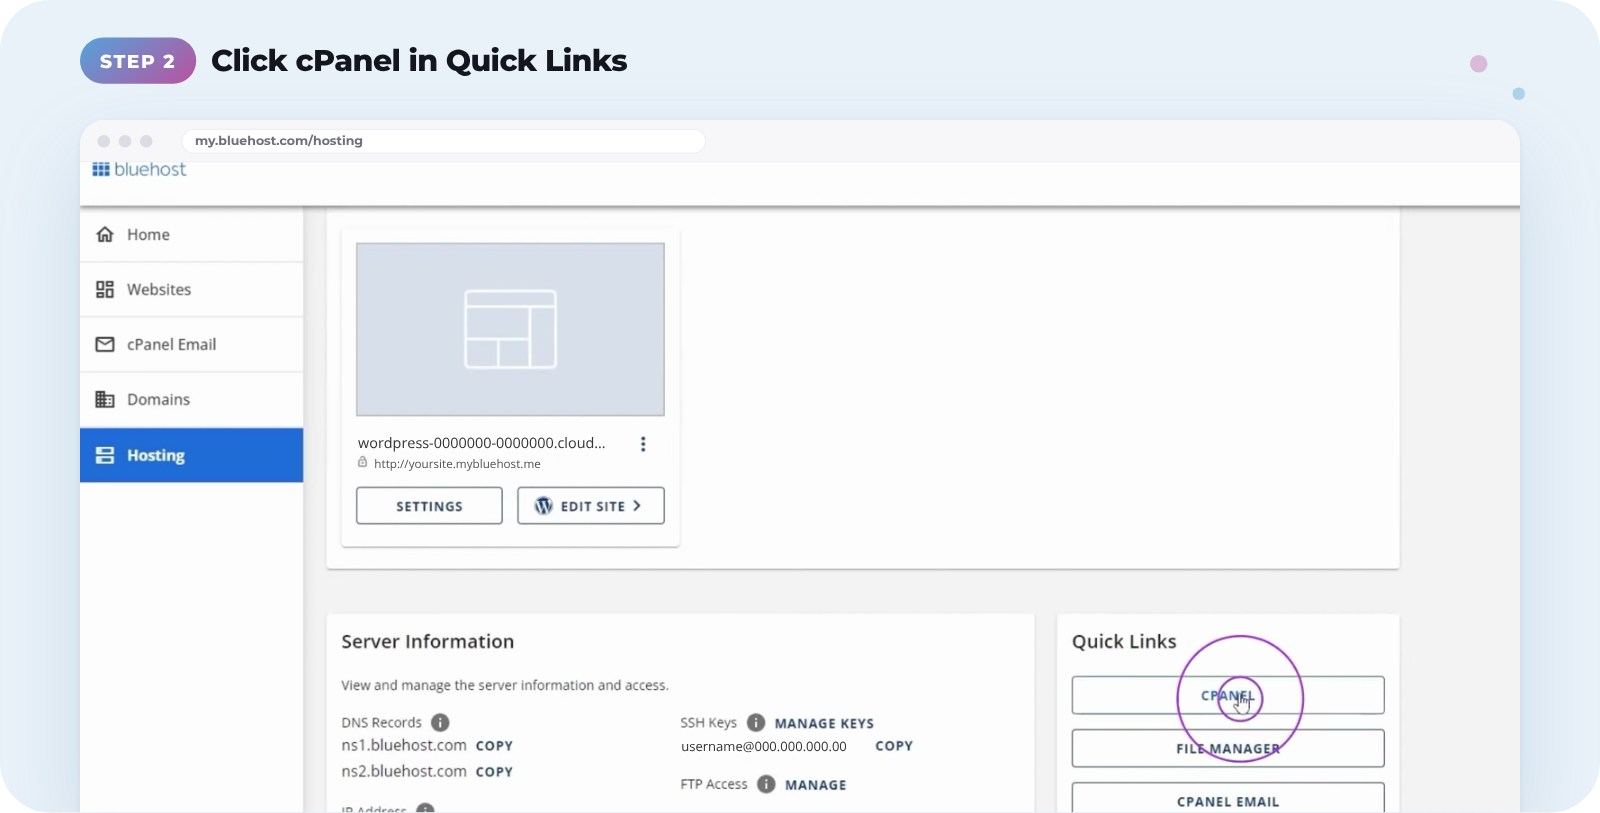
When the page loads, scroll down to the Quick Links section and click cPanel.
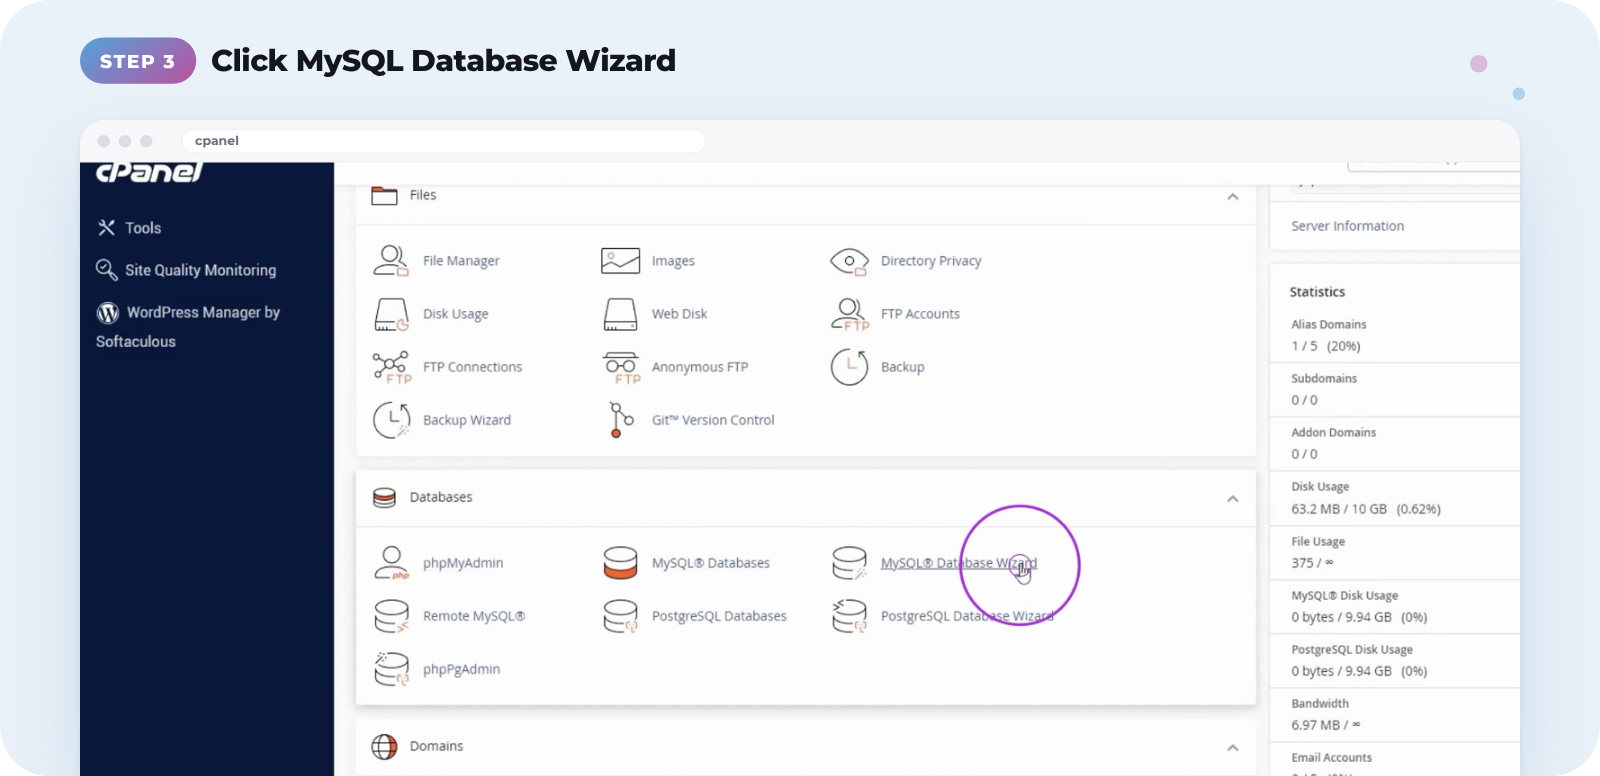
On the cPanel homepage, find the Databases section and click MySQL Database Wizard.
Create your database details
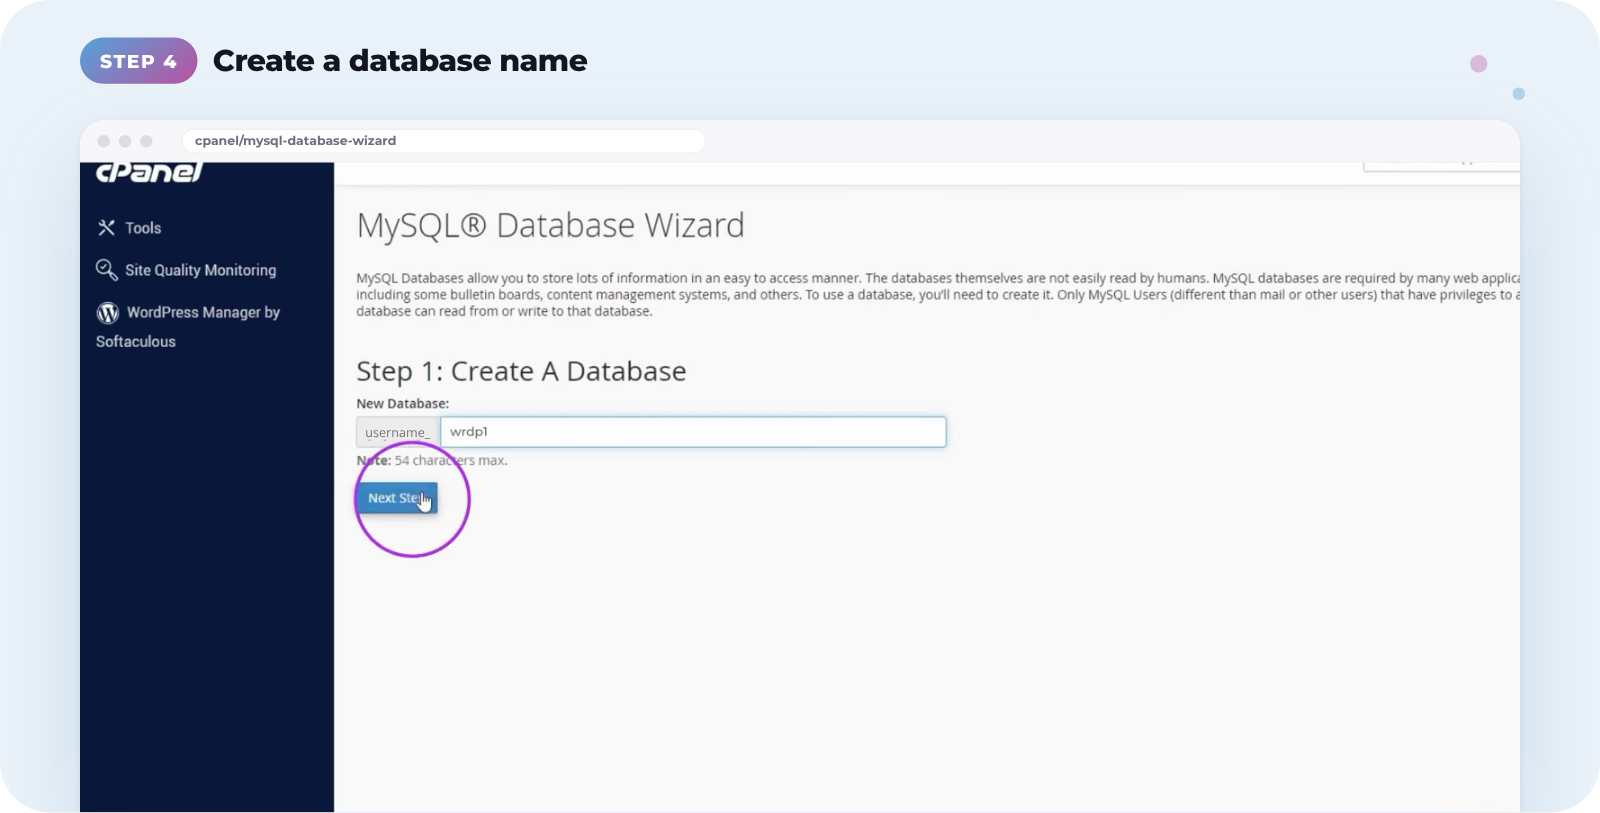
Enter a name for your new database, then click Next Step. Bluehost adds your cPanel username to the front of it, so note the full name, such as username_wrdp1.
Enter a Username for your database user. Again, note the full name including the prefix.
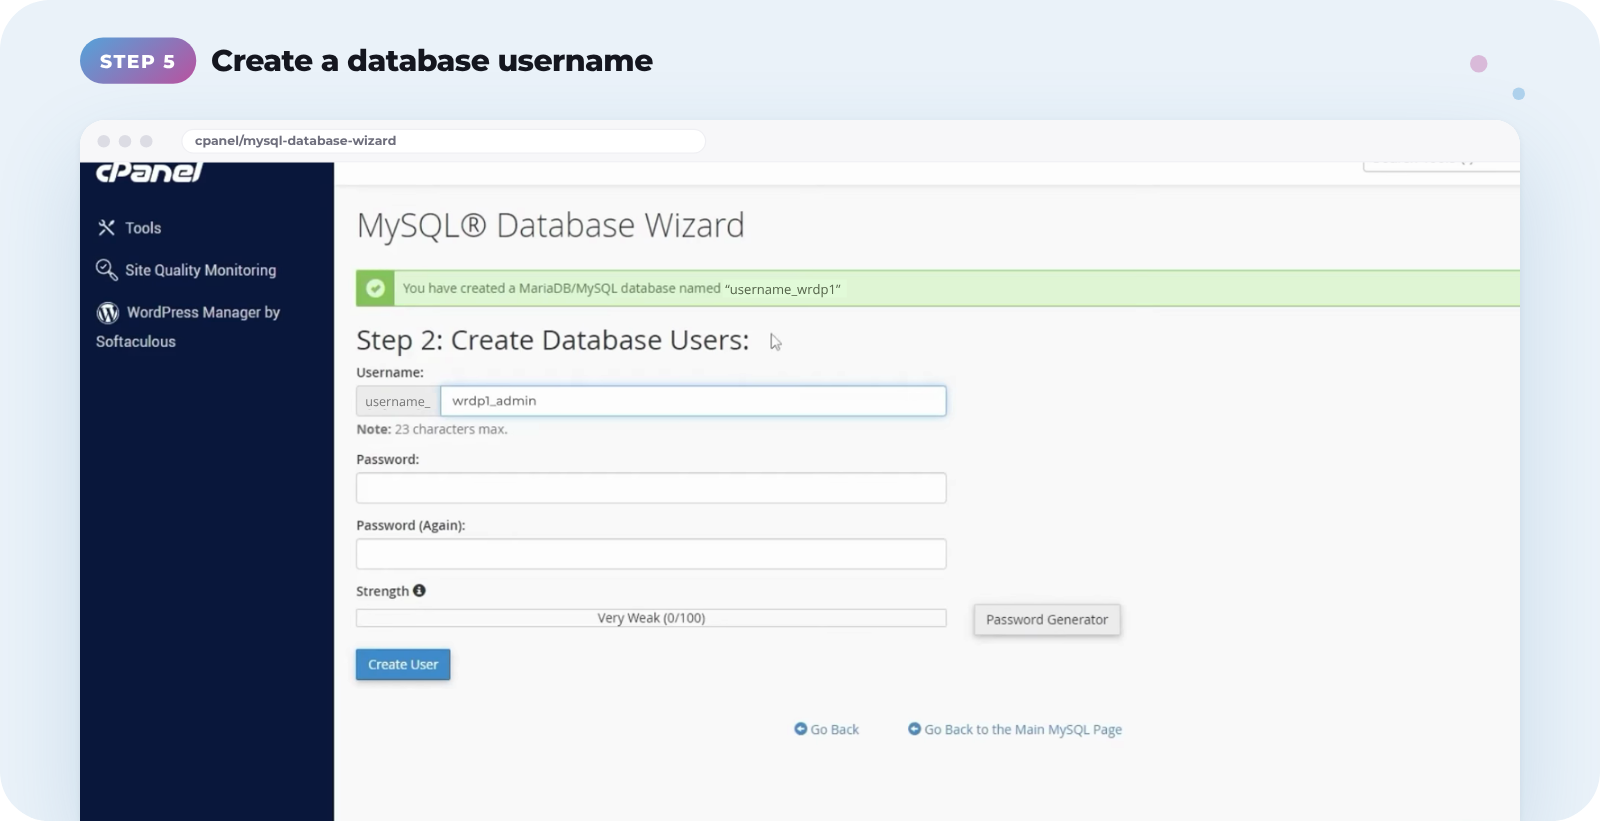
Click Password Generator and copy the password into a text file, or write it down. Tick I have copied this password in a safe place, then click Use Password.
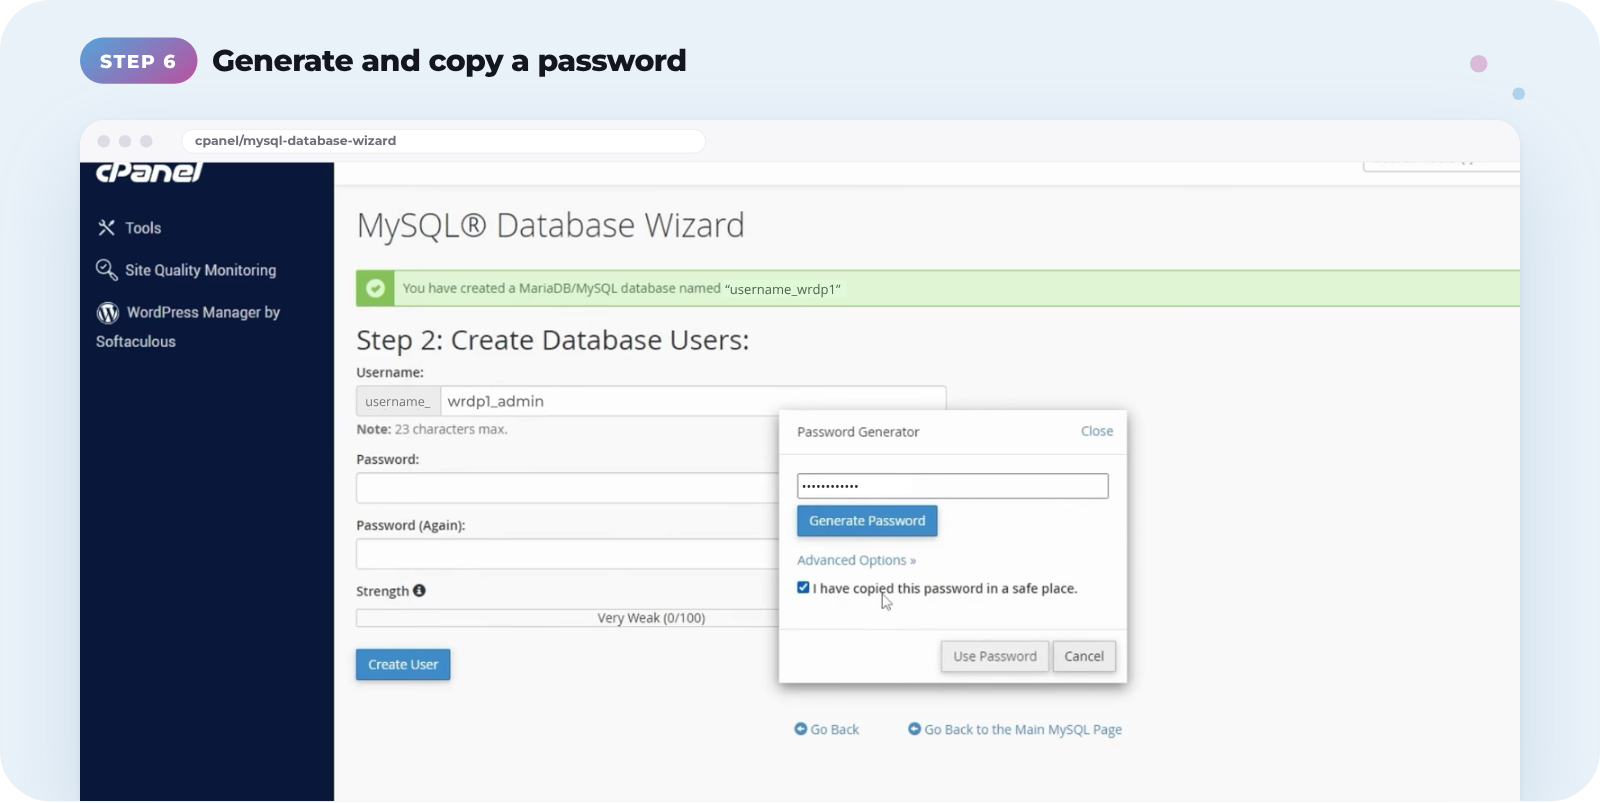
Click Create User.
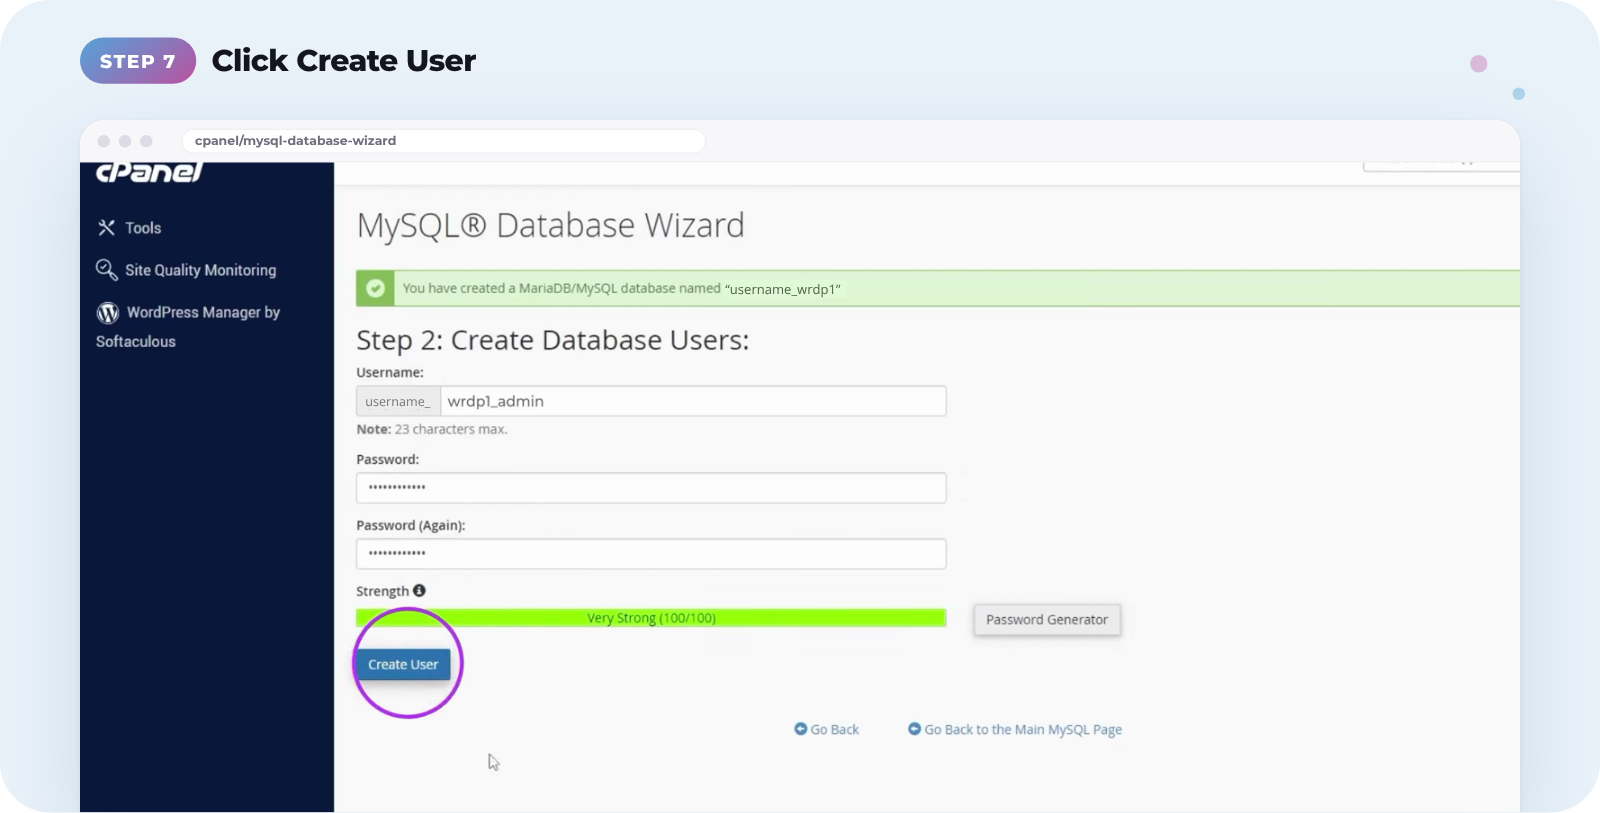
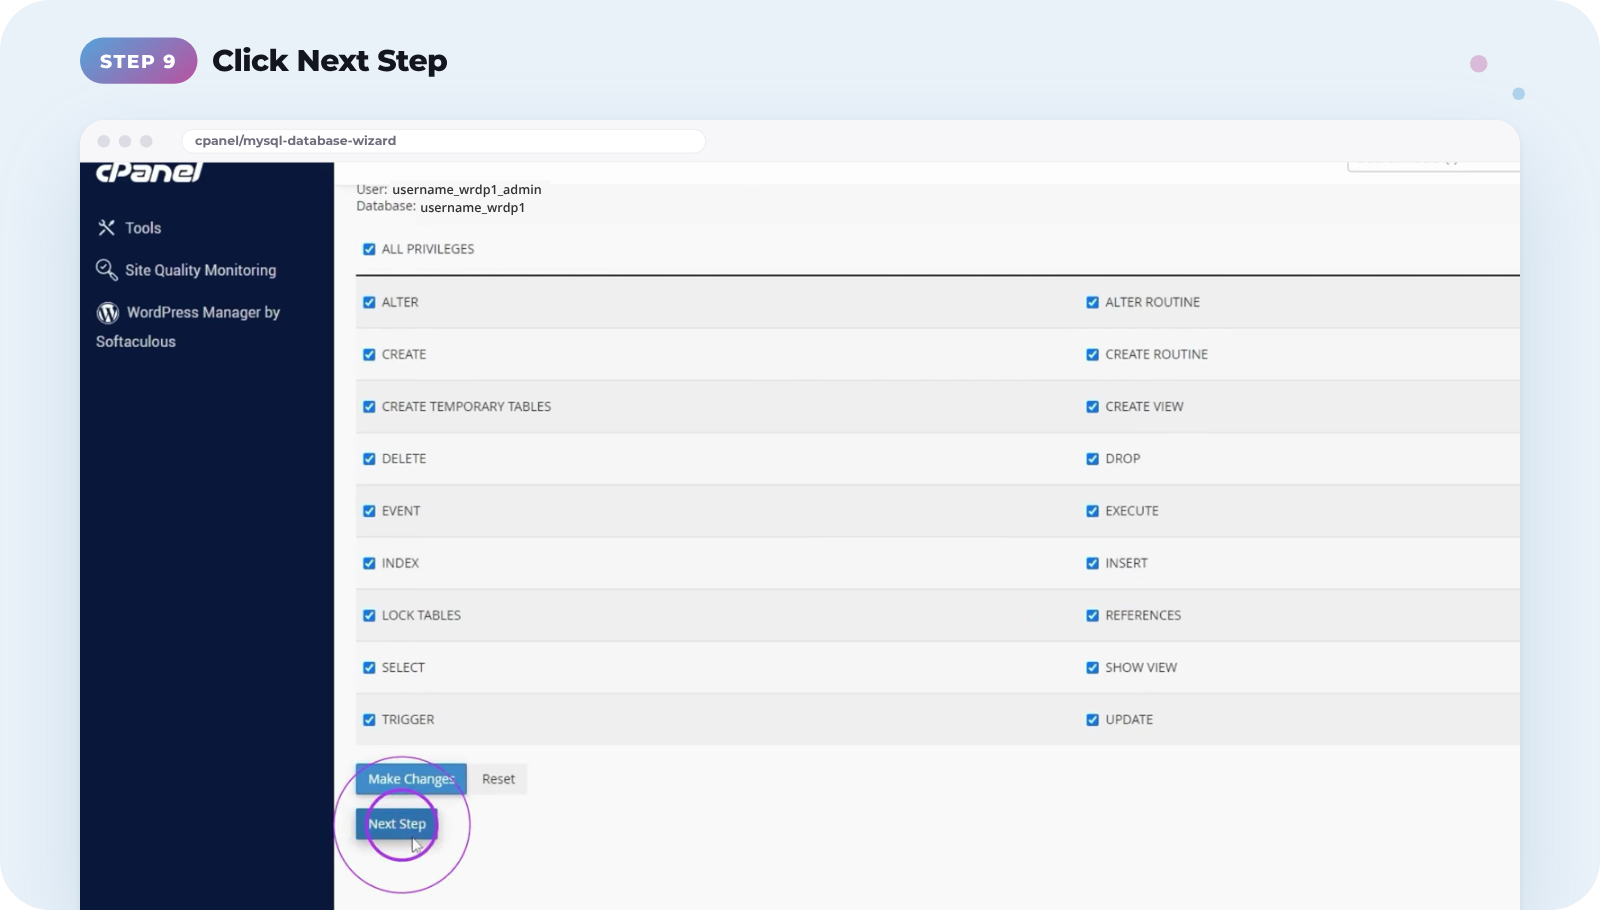
On the next screen, tick All Privileges so your user has full access to the database.
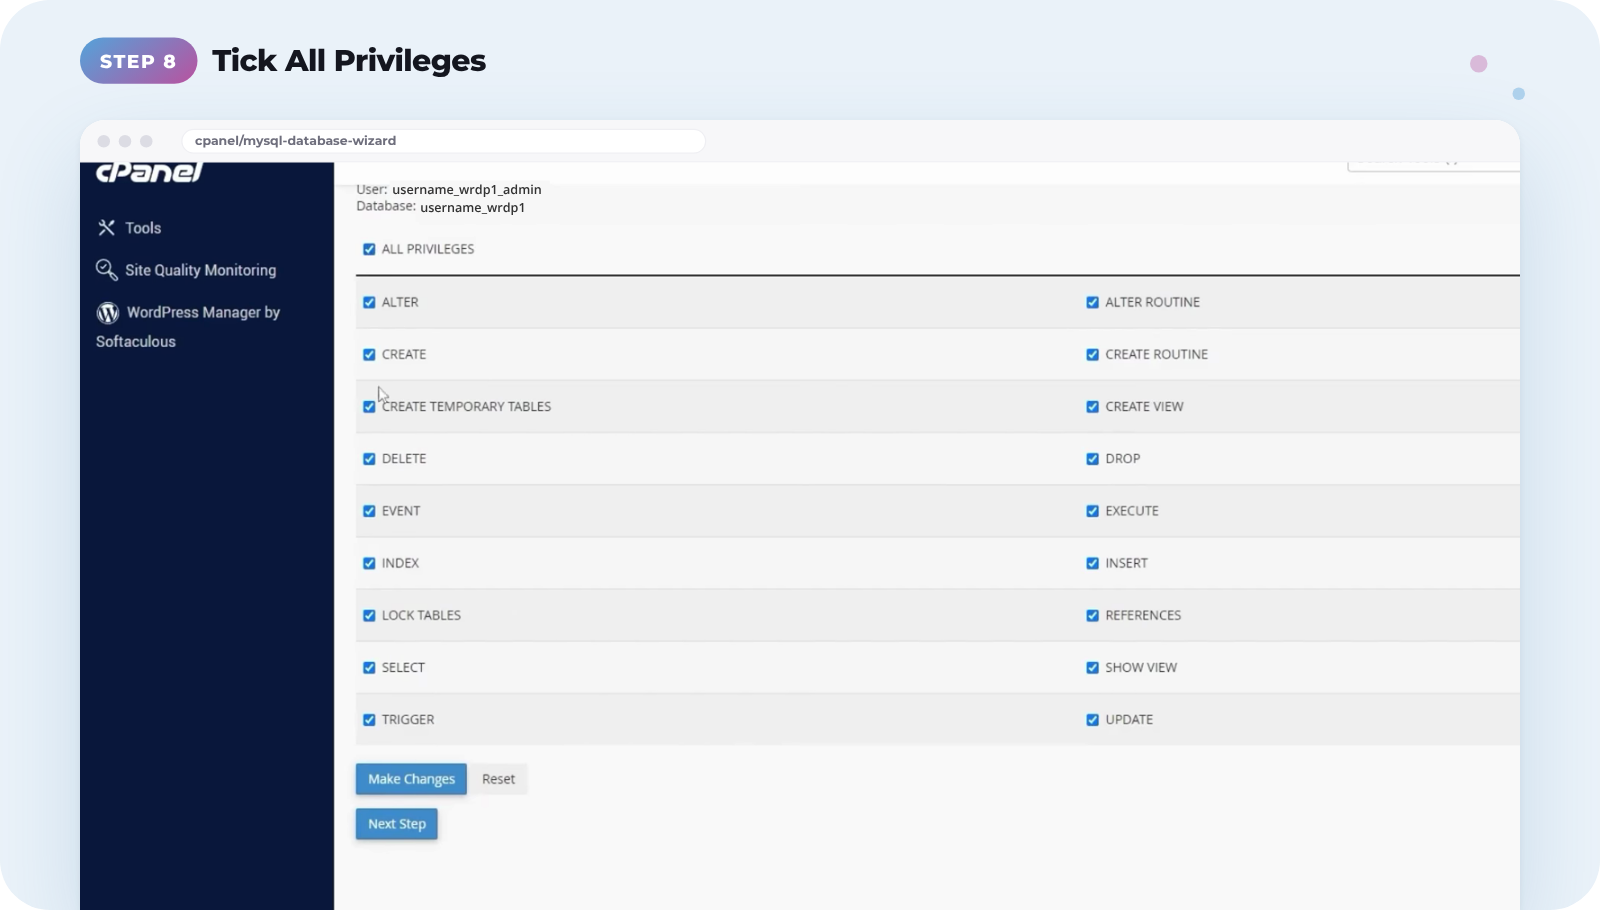
Click Next Step.
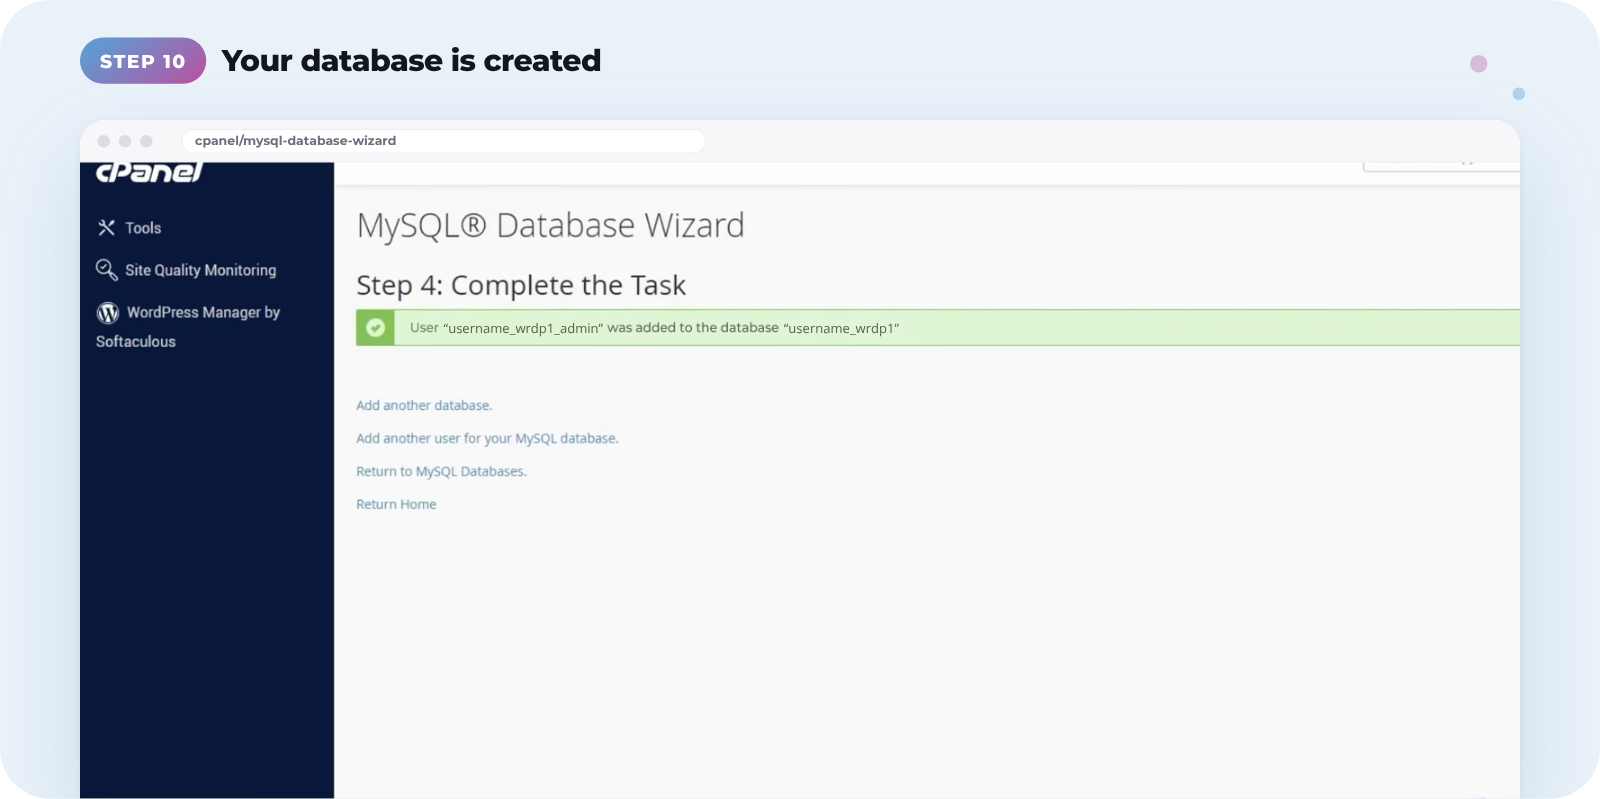
That’s it. Your database is created and your user has been added to it.
Save your password now. The password from the generator isn’t shown again, so keep it somewhere safe before you click Use Password.
Use your database details in Transferito
Go back to the Transferito plugin. On the Destination Server Database Details screen, enter your Database Name, Database Username and Database Password, then click Start Migration.
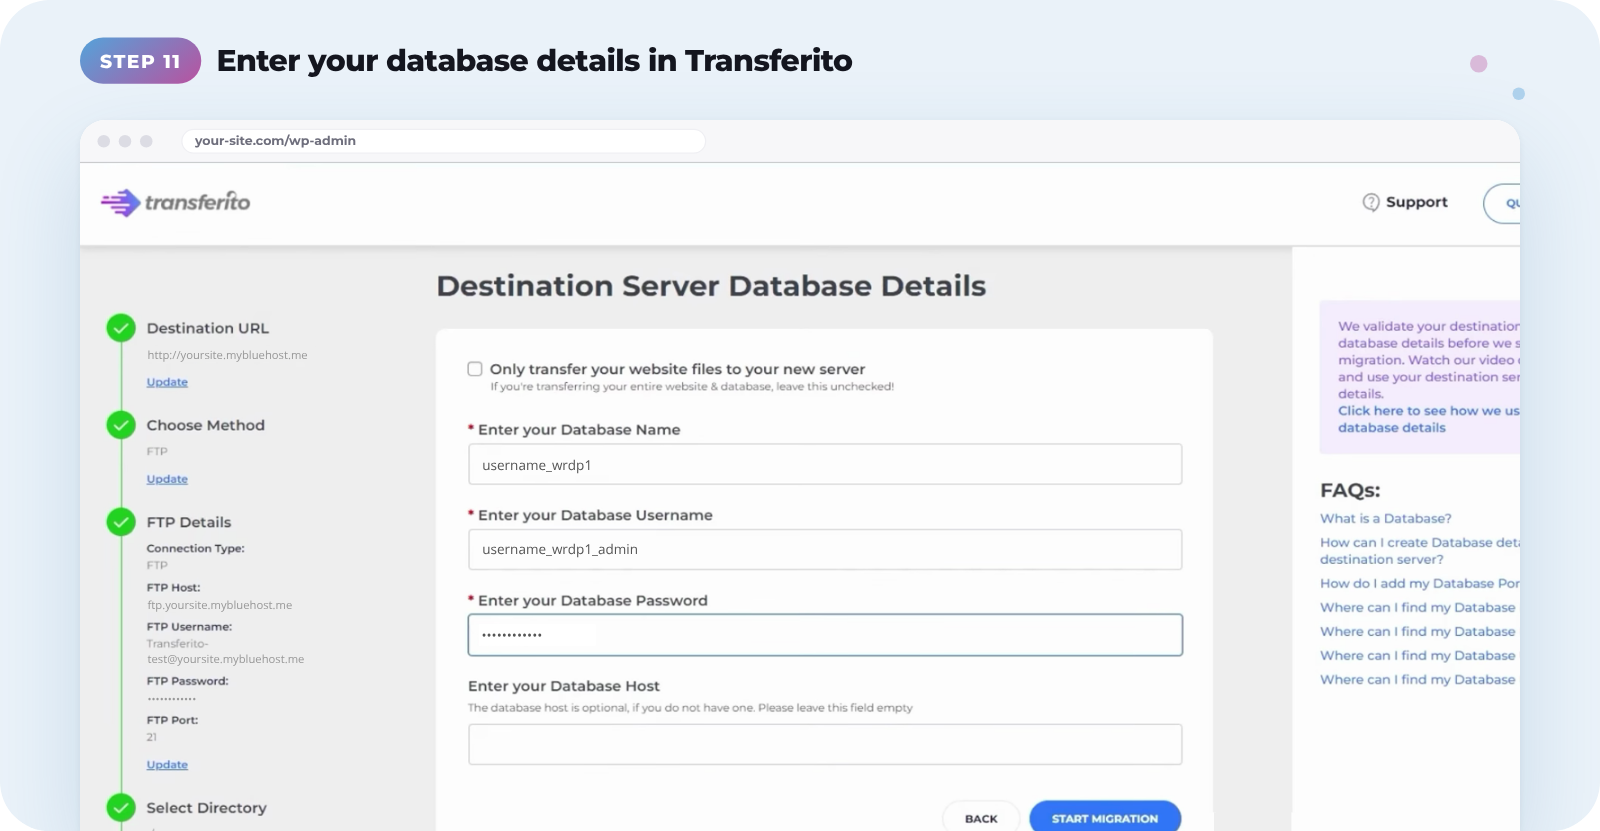
Database Host is optional. If you don’t have one, just leave the field empty.
Watch the full video
This video walks through creating your database details on Bluehost from start to finish.