The FTP migration method lets you migrate your WordPress site with the official Transferito WordPress migration plugin, using FTP details for your destination server. Creating the right FTP account on Bluehost is the key to a successful migration.
This guide shows you how to find your site’s document root, create an FTP account that points to it, and add the details to Transferito.
In this guide
Log in to your Bluehost account
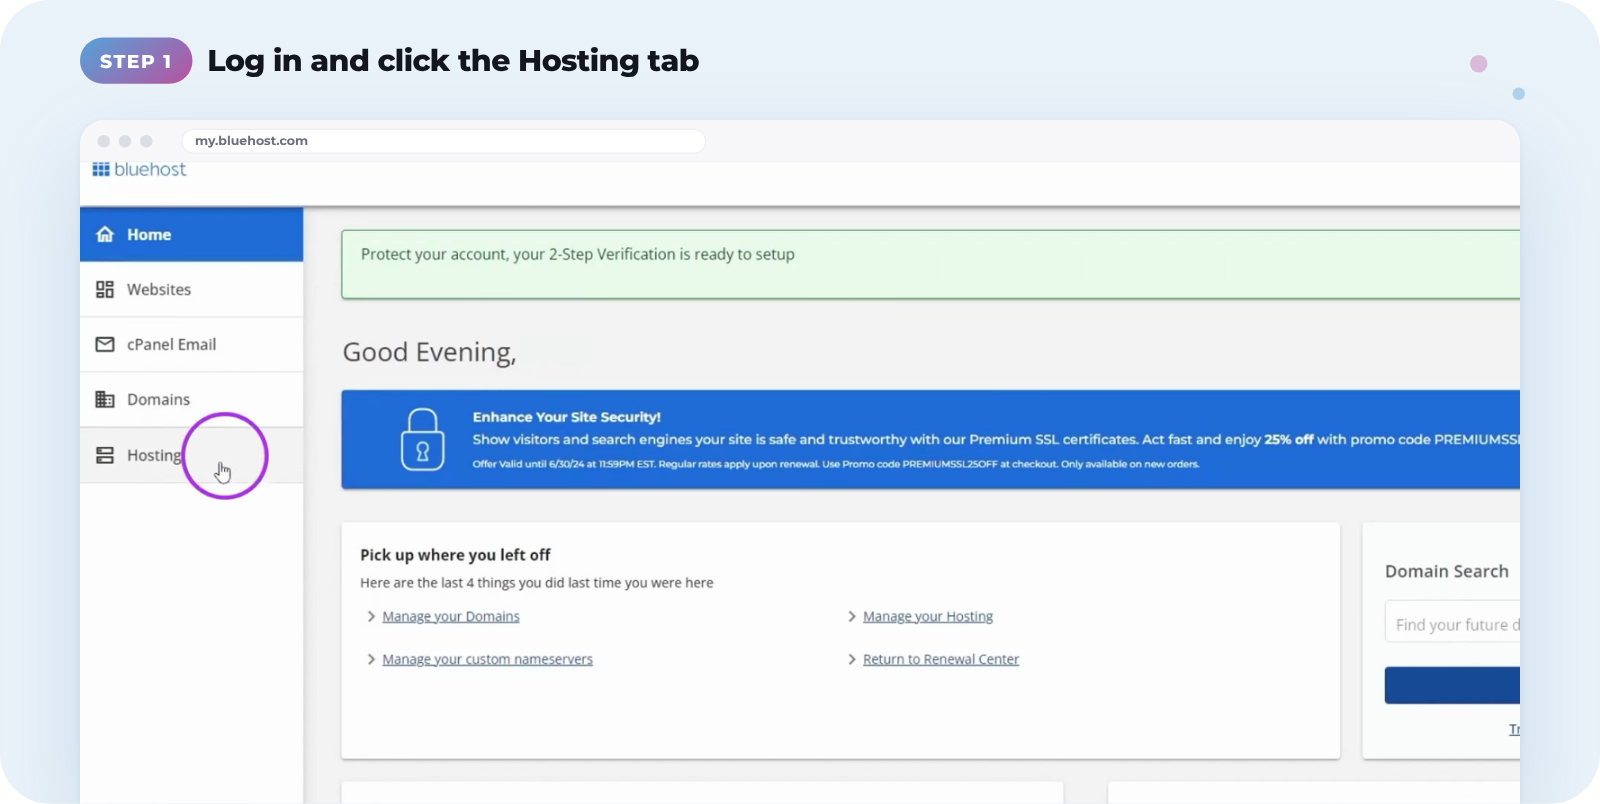
Log in to your Bluehost account, then click the Hosting tab on the left.
Find your document root
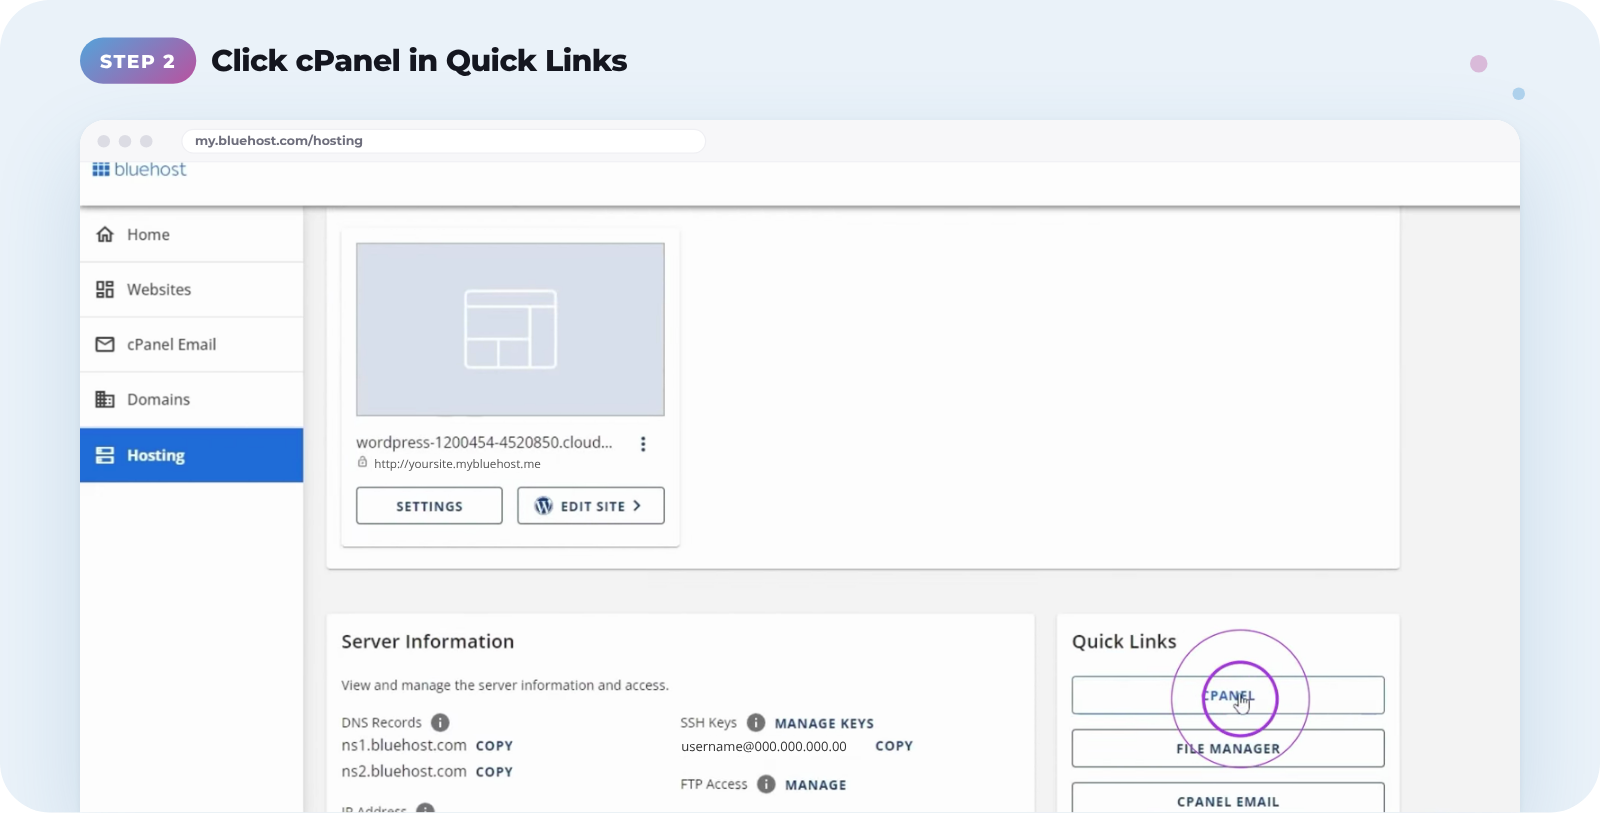
When the page loads, scroll down to the Quick Links section and click cPanel.
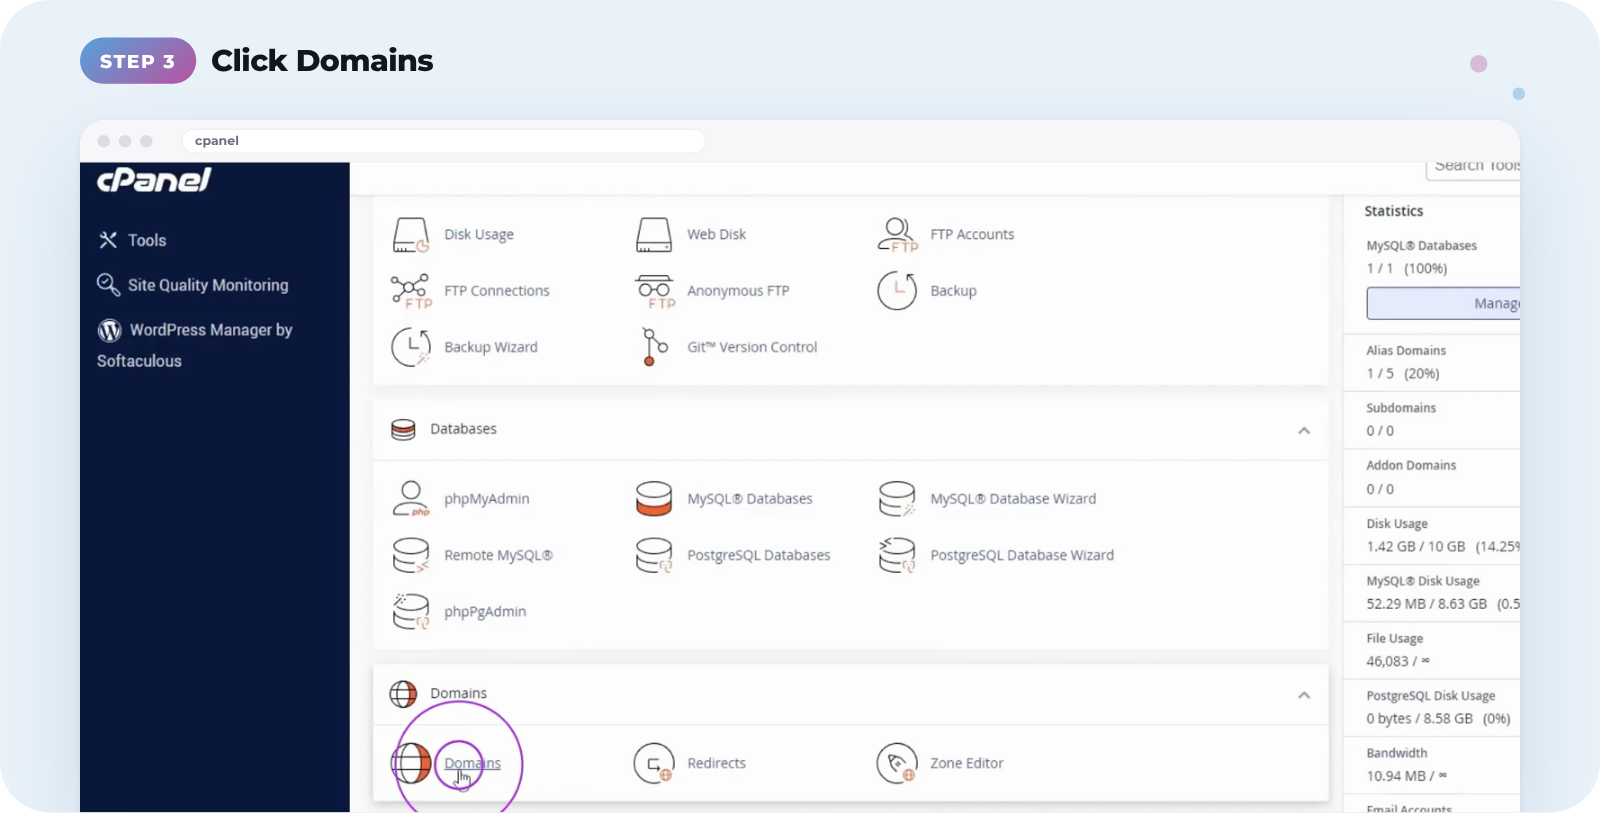
On the cPanel homepage, find the Domains section and click Domains.
Look at the Document Root column. It shows the folder each of your domains is linked to. Note the document root for the domain you’re migrating to, as you’ll need it to create your FTP account.
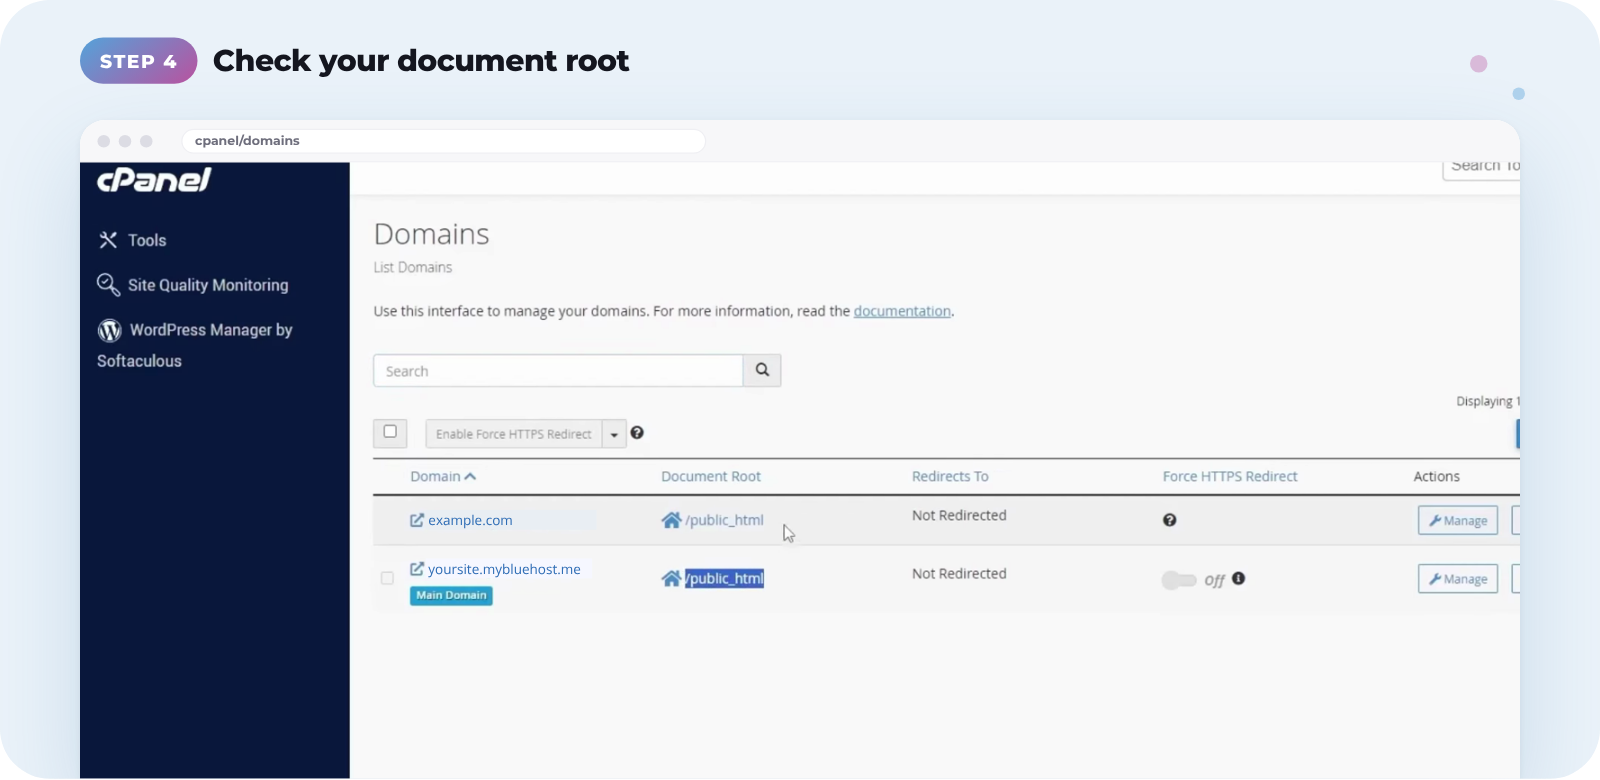
What’s a document root? It’s the folder on the server where your domain’s website files live, often /public_html. It’s also the directory your FTP account needs to point to.
Create your FTP details
Once you’ve noted your document root, go back to the cPanel homepage.
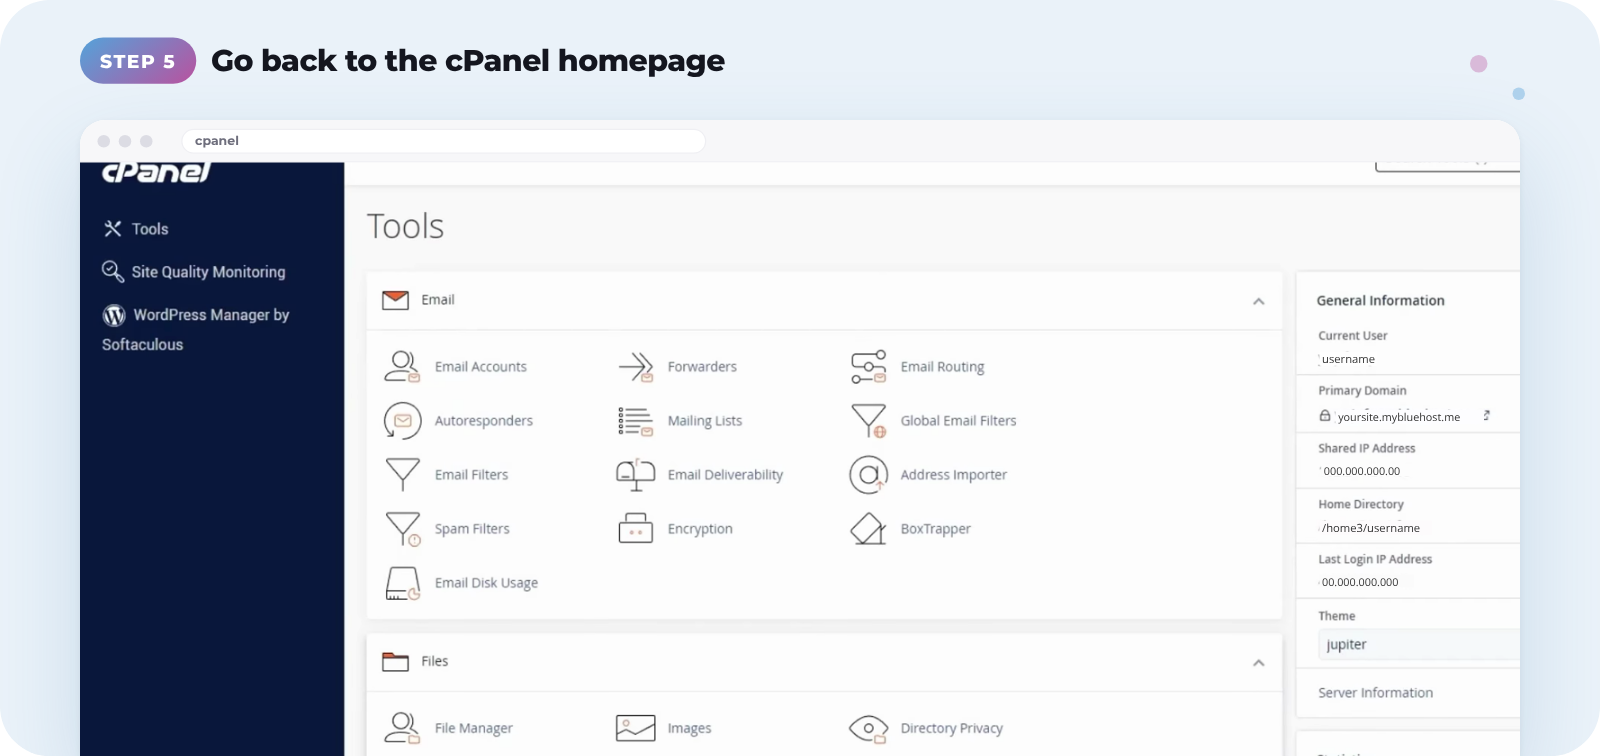
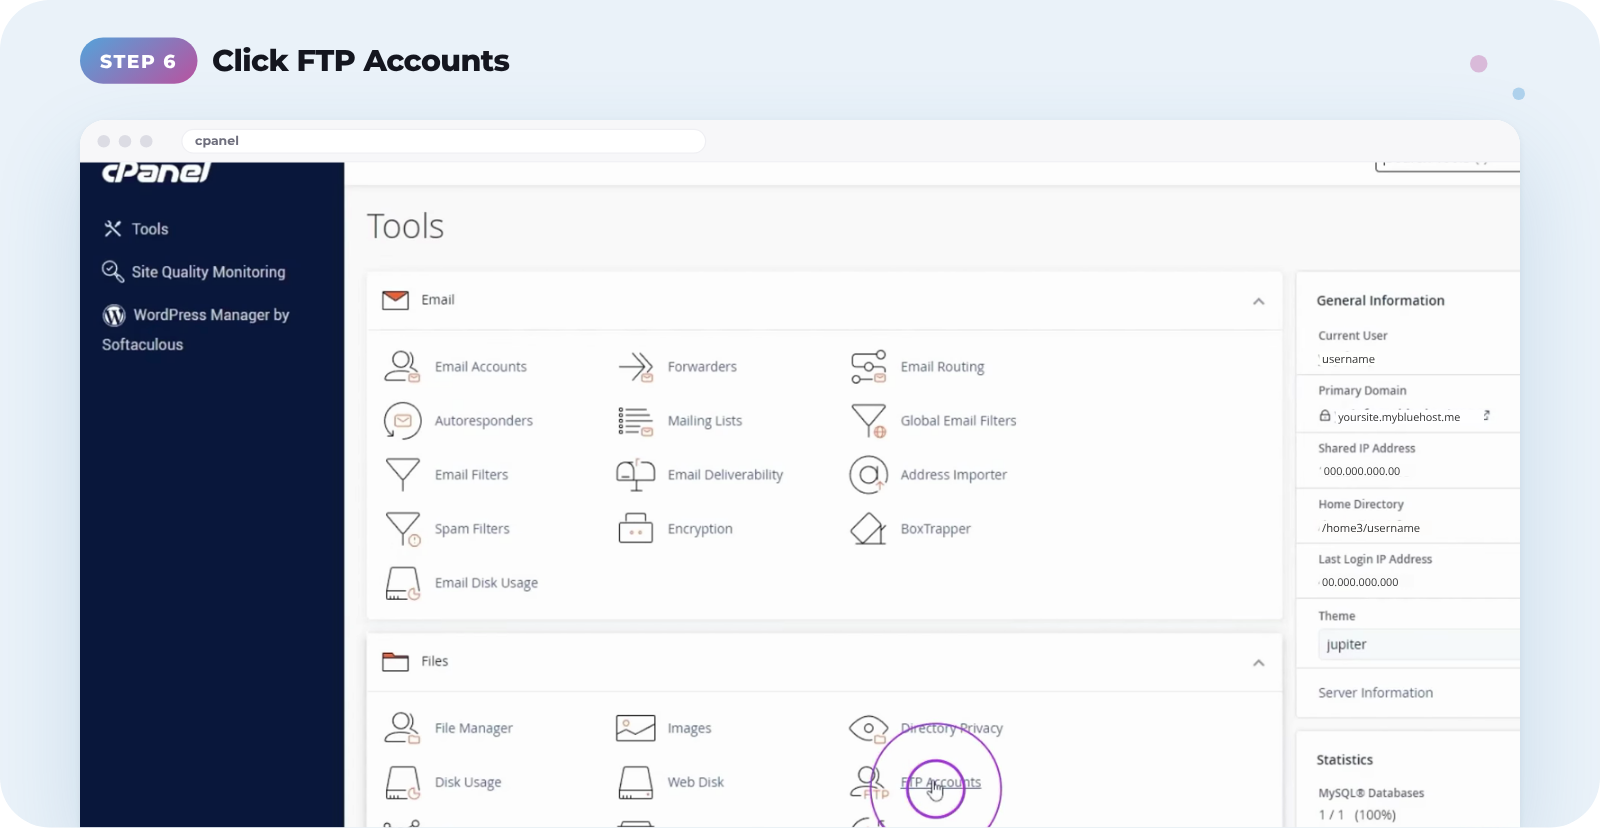
In the Files section, click FTP Accounts.
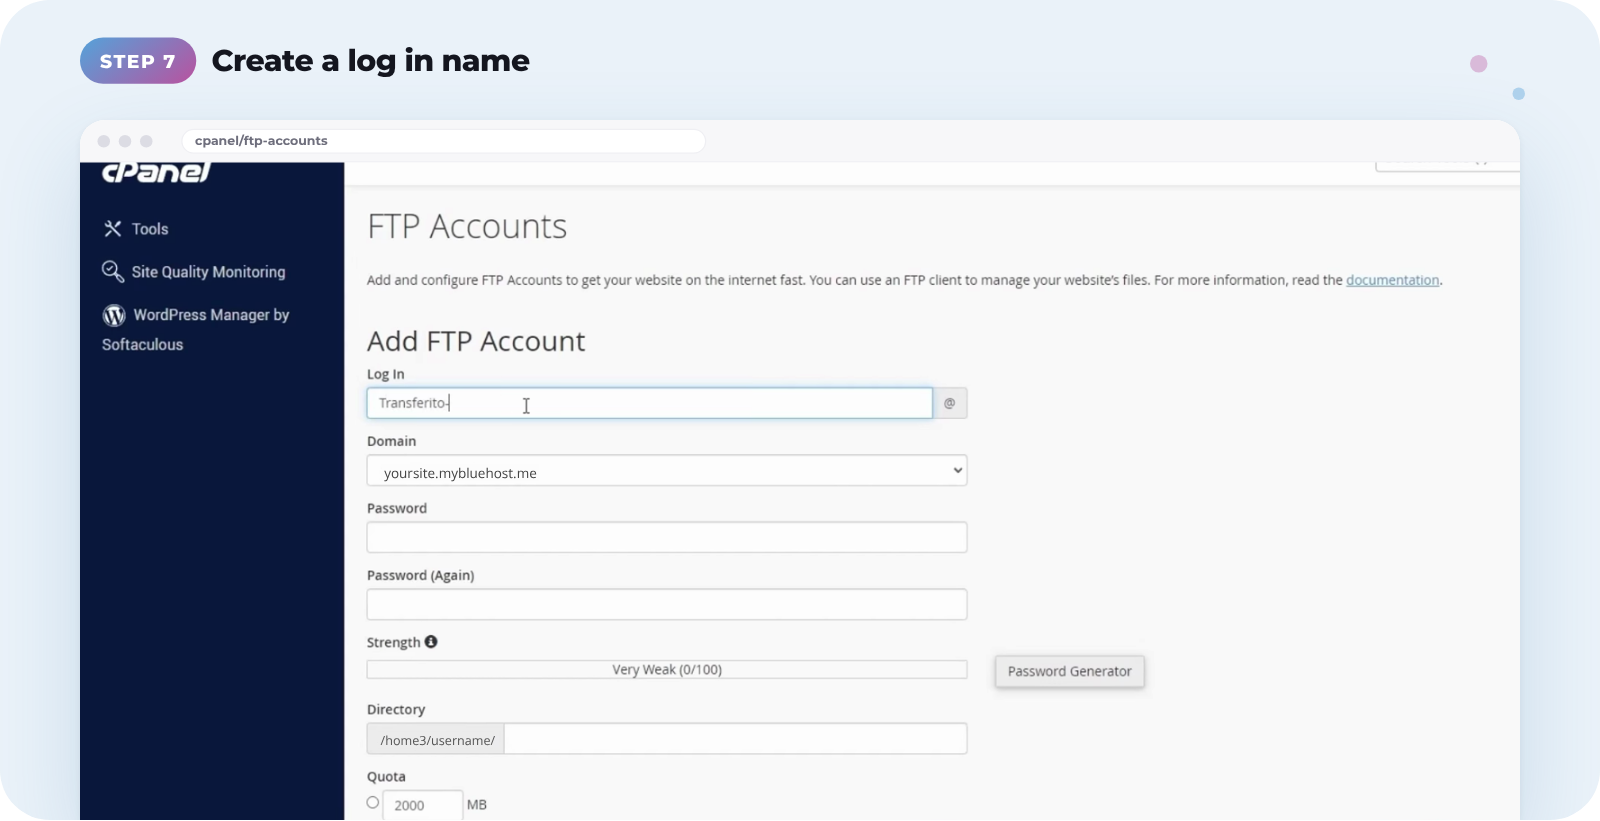
Under Add FTP Account, enter a Log In name. It can be anything you like, such as Transferito-test.
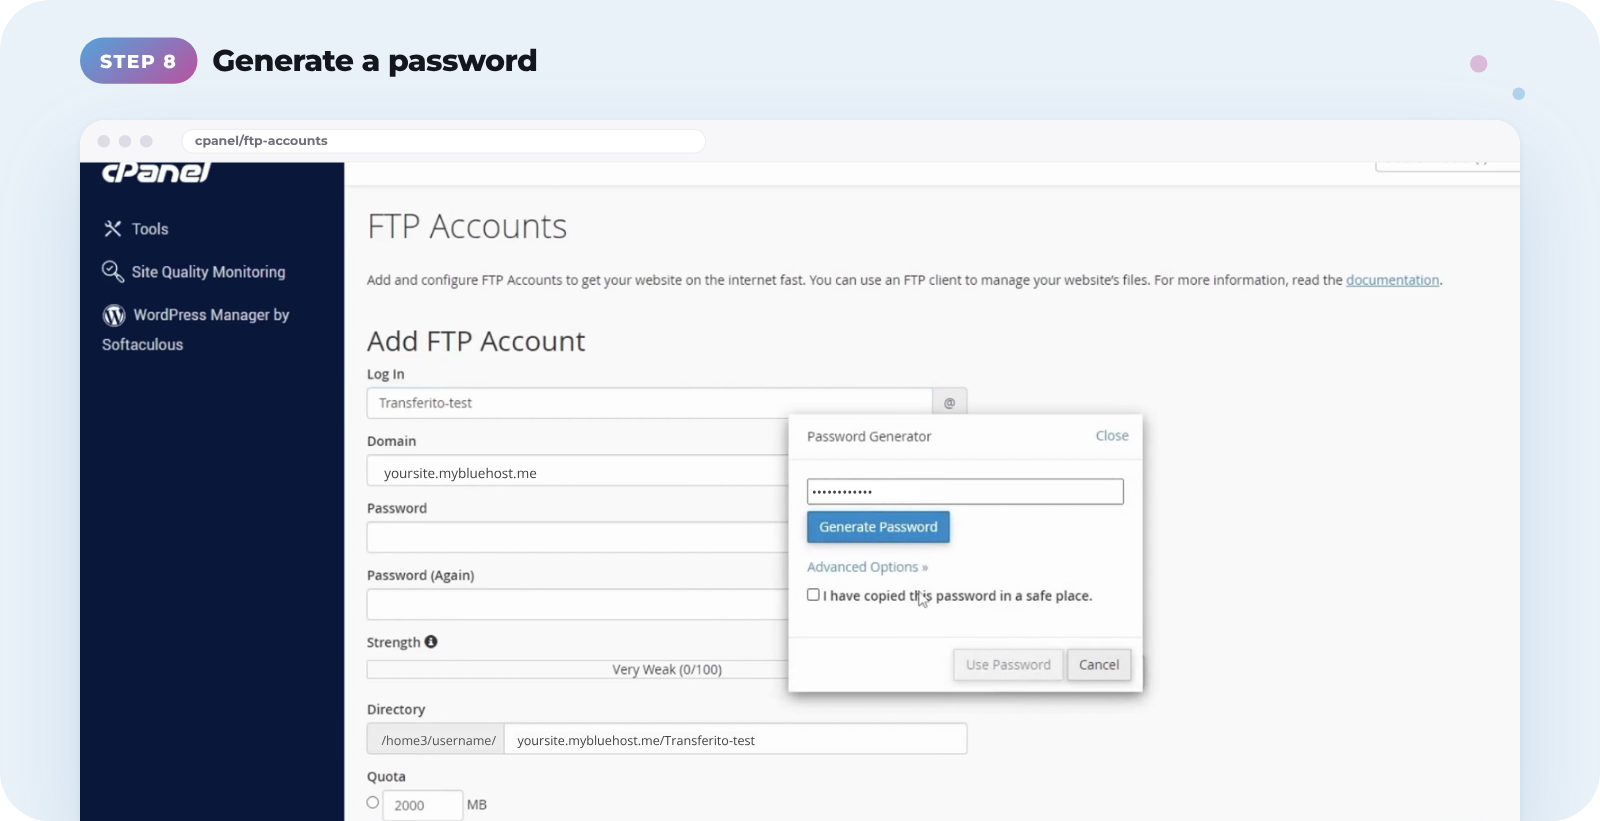
Click Password Generator and copy the password into a text file, or write it down. Tick I have copied this password in a safe place, then click Use Password.
In the Directory field, type the document root you noted earlier. If the folder exists, it’s highlighted in yellow, so you can select it.
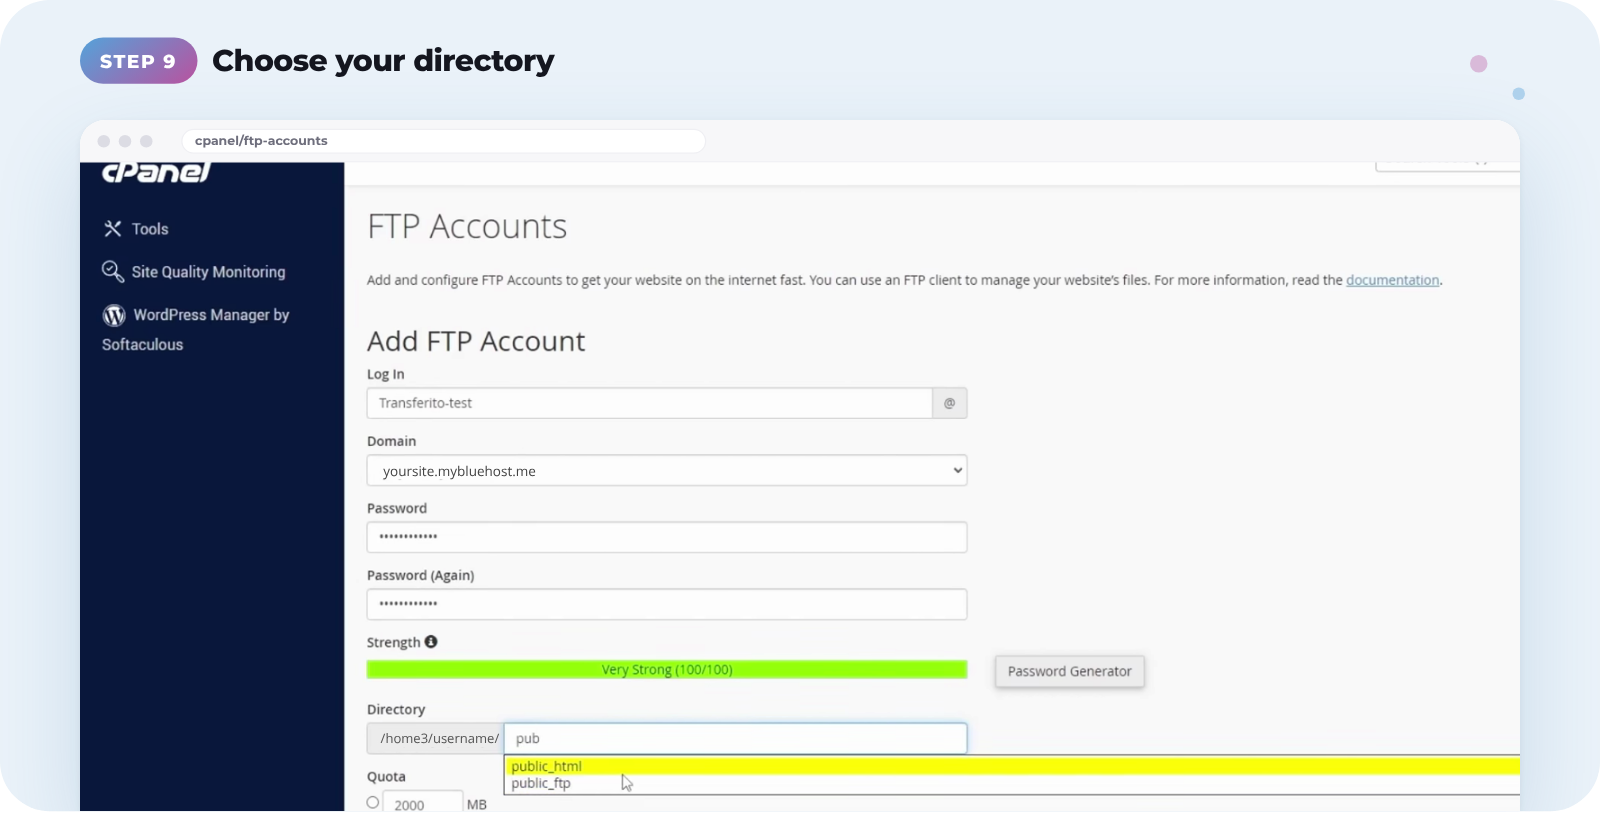
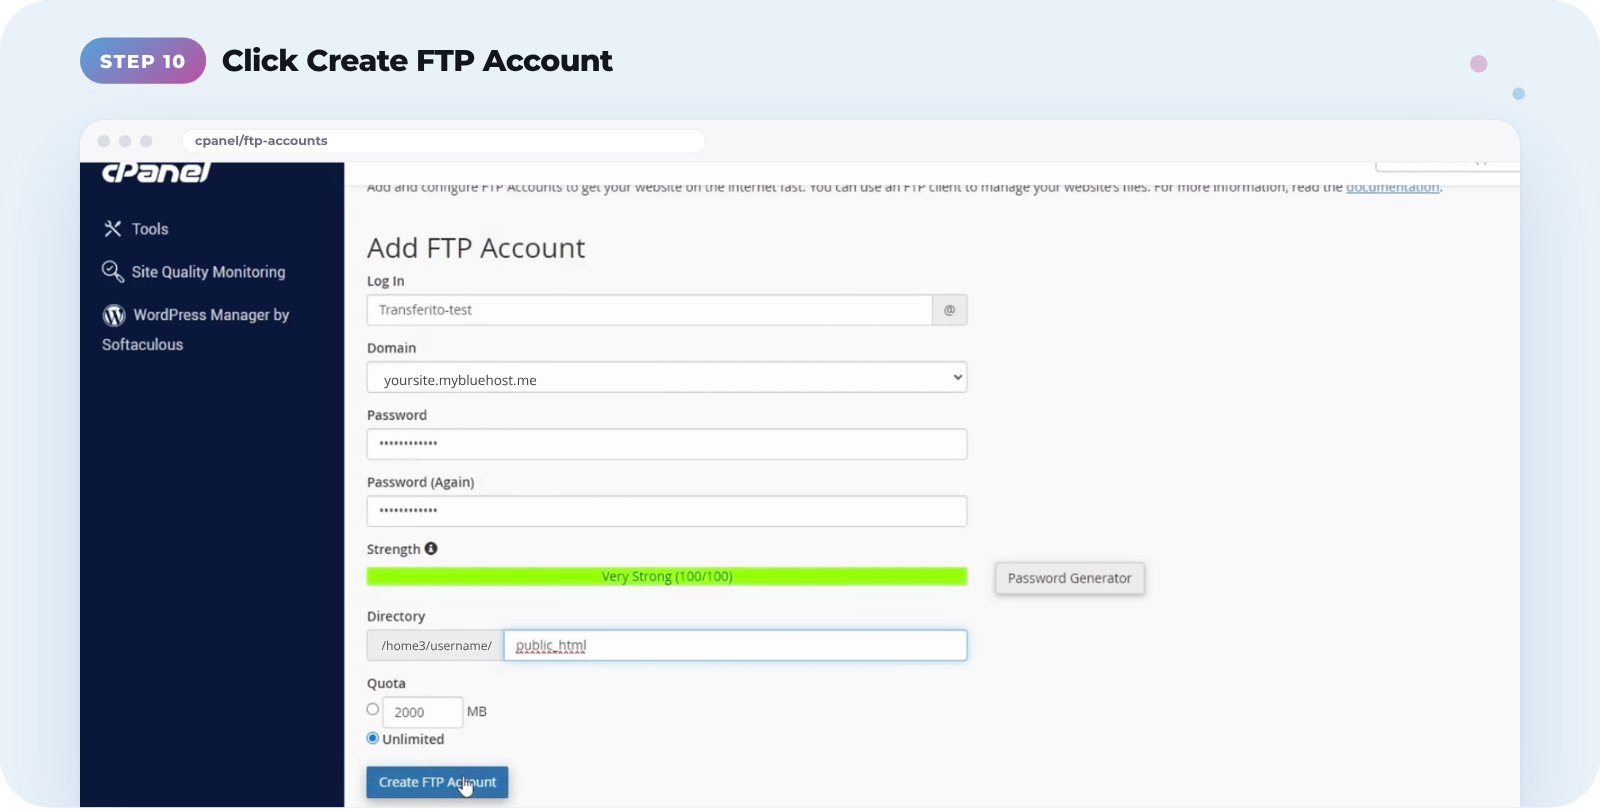
Once every field is filled in, click Create FTP Account.
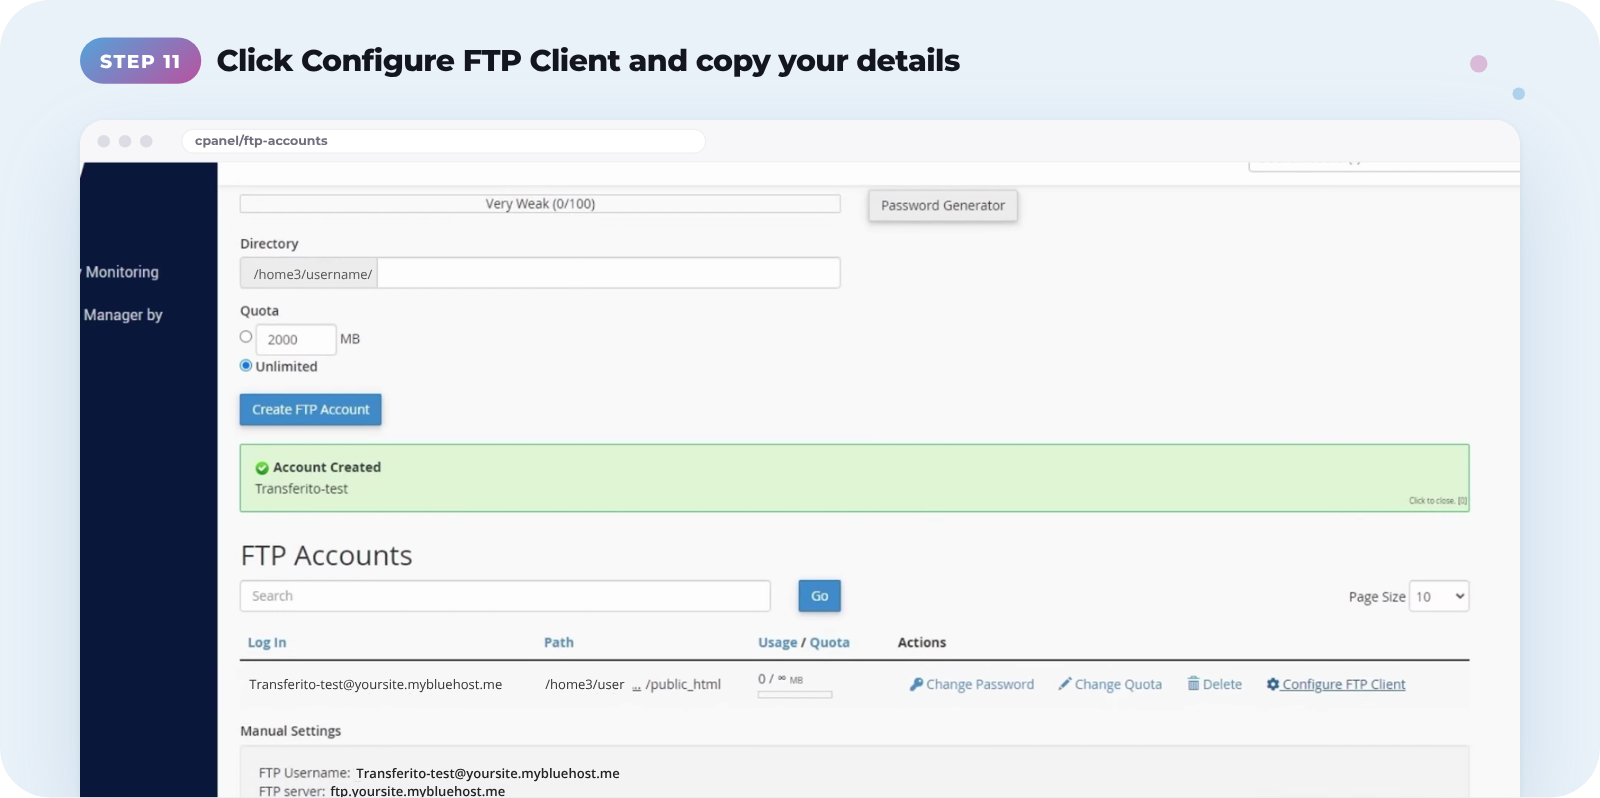
Find your new account in the FTP Accounts list and click Configure FTP Client. Copy the FTP Username and FTP server shown under Manual Settings.
Save your password now. The password from the generator isn’t shown again, so keep it somewhere safe before you click Use Password.
Use your FTP details in Transferito
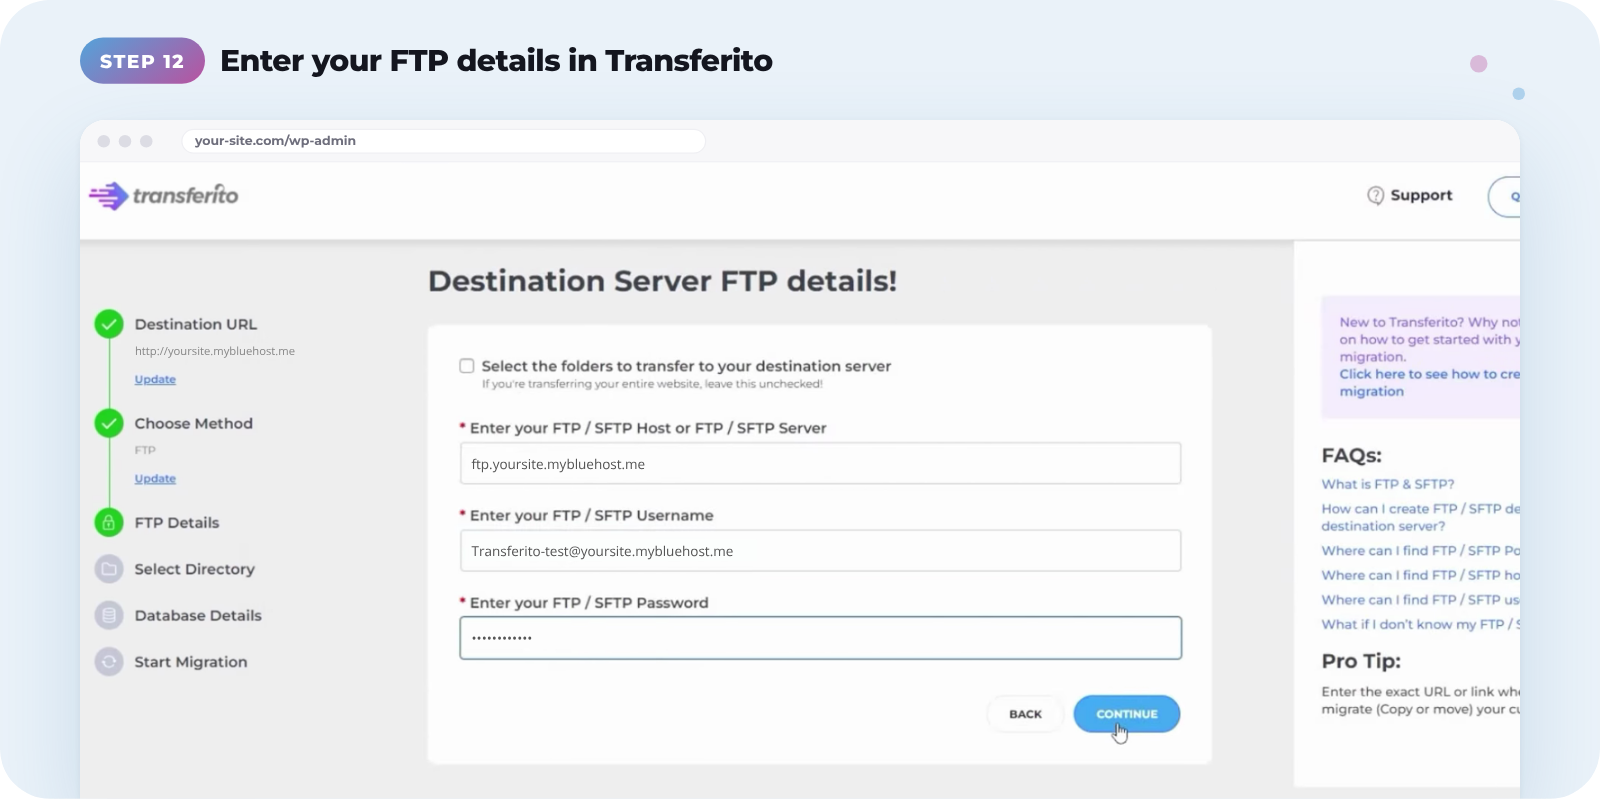
Go back to the Transferito plugin. On the Destination Server FTP details screen, paste in your FTP server, FTP username and the FTP password you saved, then click Continue.
Next: Transferito will ask for your destination database details. See Creating your database details.
Watch the full video
This video walks through creating your FTP details on Bluehost from start to finish.